Documenting Darkroom Experiences
|
What is a photogram?
A photogram is a photographic image that is made without a camera. Objects are placed directly onto the surface of a light-sensitive photographic paper and then exposed to light in a darkroom. The paper is then developed by using light-sensitive chemicals in the darkroom. |

|


|
The Darkroom
1.What is a darkroom? A darkroom is used to process photographic film, to make prints and to carry out other associated tasks. It is a room that can be made completely dark to allow the processing of the light-sensitive photographic materials, including film and photographic paper. 2. the set up. Darkrooms need to be reasonably light-tight. Windows will need to be covered with material to block light entering the room. Similarly, light-leaks around doors need to be covered. An enlarger is an essential darkroom tool which projects white light on to photograthic prints which acts as a negative against the print turning it black where it is exposed. We then use the darkroom trays. which contain fix, stop, developer, you place your photographic print into the developer first for 2 minutes which corrects the print revealing the image, then in the stop for 30 seconds to stop this process, then in the fix for 4 minutes. then place in water to clean it for 4 minutes. make sure to use tongs when moving your print as the chemicals can be damaging. 3. how to check the chemicals. To check the chemicals you put a small cut of film into them and time how long it takes to become clear. If its over the suggest time you need to change the chemicals. |
My Photograms.


Exposure Test
You need to control the amount of time you expose the print to white light for. This can be acheived by using a timer when revealing the light. For example a longer exposure time will make the objects appear more grey with a smaller exposure time making the objects appear prominently whiter whereas a shorter exposure length will leave the images darker as more light has been exposed through the object
Test strips and prints
Processes

|
Painting on developer
With this process we wee required to create a normal photogram with a 2 second exposure time, however when we got to the chemical trays we had to use paint brush to cover the photogram with. with this photogram i flicked/splashed the photogram with the fix chemical which creates this distortion effect on the photo.
|

|
Double Exposure/moving object
For this process i was required to expose the photo with multiple exposure to light. I did this by using a black sheet and moving it ever so slightly every time I expose the photo to light, this creates a different shade throughout the photo where it had been exposed for longer. The fix/stop is all the same in this process.
|

|
Solarising.
Expose your photogram for the time you have identified in your test strip. Put your print in the developer as usual however, once the print becomes established, remove it and re-expose it to the light of you enlarger. Continue to process you print as normal. This gives the photogram a greyer look as more light has been exposed to the photogram In the developer for Re-exposed for 1 sec Re-exposed for 2 secs 15 secs 30 secs 60secs |

|
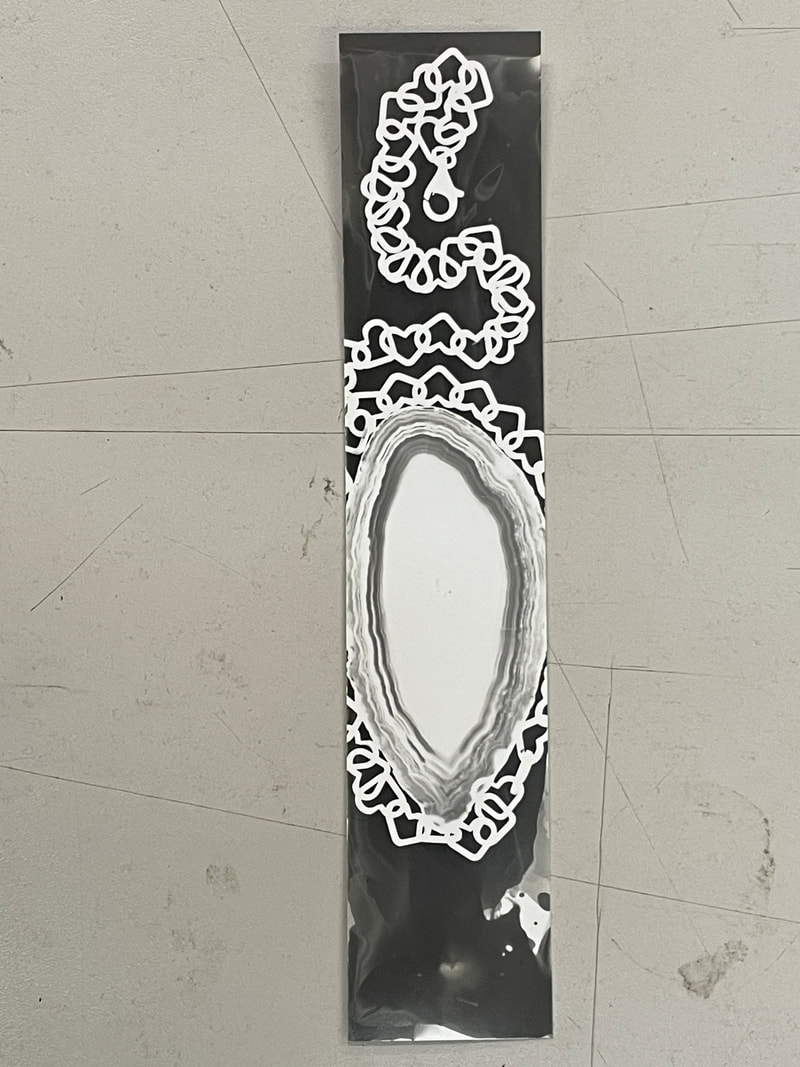
Weaving
For this process i was required to weave a positive and negative print of the same object. When weaving you have to cut 1cm lines on one print horizontally and the other vertically so they can be weaved together.
|
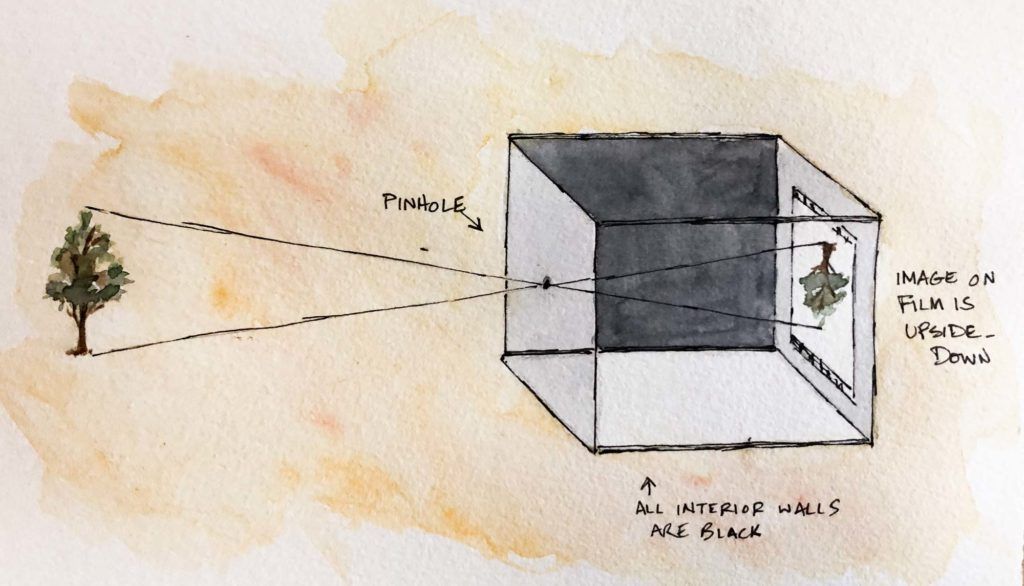
Pinhole Camera
in this task i was required to use a can as a pin hole camera and create photo using different techniques. A pinhole camera is where u use a can to create photos, you need to remove the top of the can and create a cover for it making sure no light can get in. Then u punch a small hole using a pin also covering this with some tape. to produce a photo you need to put a photographic print inside facing the pinhole. Then take your can outside, and depending on the weather eg. if its bright or not you choose a certain time you should open the pinhole to light for by removing the tape covering it.
|
In order to make a pinhole camera you will need the following items:
|
|
Pin Hole Artist: Ben Nathan
Ben Nathan works across different media, from painting and photography to film and sculpture. His artistic practice reflects on the functionality of the city and its industry, documenting the evolution of urban change. Its scope draws attention to basic civil amenities, and the people who serve our society, in what could be considered as the ‘Real’ but ‘Invisible City’. His explorations into infrastructure act as a catalyst to question the changing nature of our cities environment and access to public or private space Pin hole artist: Ben Nathan. Examples of Ben Nathans work:

|

|
Window
For this I went to a high part of a building looking out of a window, this day was brighter than the others so my exposure length was around 2 seconds before closing the pin hole. My photo shows very distingtive darker tones to lighter ones where the building is much more prominent than the landscape behind it.
|
Positive

|
Negative

|
Portrait/Double Exposure
For the portrait made the person stand still whilst opening the pinhole to light. I exposed the print to light for around 4 seconds before closing it. the photo on the right is a negative print of the one to the left which is a positive. i achieved this by doing a sandwhich print process where i place a blank print below the negtive and exposed it to light for 2 seconds which creates this effect.
|
Positive

|
Negative

|
Building.
For this response i had to take a photo of a building. I really like how my negative turned out as it came out really clear making the print look like an actual photo.
|
Positive

|
Negative

|
Introduction To A Camera
35mm SLR camera:

SLR cameras provide photographers with precision; they provide a viewing image that will be exposed onto the negative exactly as it is seen through the lens. An SLR camera needs photographic film to produce photos, this film is light sensitive so there is a careful process to prepare the camera for photos. The SLR camera simply opens the lens to let light onto the film, however you can change the shutter speed and aperature which can change the length of time you expose the film to light, which can give you a different outcome.
Aperature: In photography is the section of the camera that can be adjusted to let in more or less light. A small aperture lets in less light and leads to a darker image, while a larger one can flood the sensors with light.
Shutter speed: is exactly what it sounds like: It's the speed that the shutter closes . A fast shutter speed creates a shorter exposure — the amount of light the camera takes in — and a slow shutter speed gives the photographer a longer exposure.

How to load a camera:
A roll of light-sensitive film is placed within the camera. When the shutter of the camera is open, the film is exposed to light and an impression is captured. After the exposure is made, the photographer rolls the film forward so a fresh section of unexposed film is ready for the next photo. |
What is a Film?
Photographic Film is a strip of plastic that is light sensitive therefore kept in a dark container until ready to process.

|
Contact Sheet.

|

|
The Selfie
§This task "the selfie" consist of looking at the early examples of selfies and then modernised selfies that we see today. For the practical part of the task, i was required to photograph selfies of myself and using different techniques to capture the selfie for example the first selfie experiment: The Reflected Selfie. Secondly: The Obscured Selfie. Lastly: The Shadow Selfie.
What Is a Selfie
A photograph that one has taken of oneself, typically one taken with a smartphone or webcam and shared via social media.
Examples:
What Is a Selfie
A photograph that one has taken of oneself, typically one taken with a smartphone or webcam and shared via social media.
Examples:
- Photograph Selfie Experiment #1: The Reflected Selfie
- Photograph Selfie Experiment #2: The Obscured Selfie
- Photograph Selfie Experiment #3: The Shadow Selfie
Lighting
Lighting can make a huge difference to the look and impact of your portraits. For the start of this task i was required to use the studio lights and are to show these huge differences that lighting can make. And by photographing from different areas or/ turning multiple lights on or off to try and show all the ways lighting affects portraits. Here are the three types of lighting I used:
Place The Main Light First

|
With your subject in place, generally facing the camera, you'll want to place your main light just above her head and to one side. Look at where the shadows fall and adjust the position of the light until you like what you see. For basic portraits, shorter shadows are best and you'll get those by moving the light closer to the front of the subject's face rather than far off to one side. Lower, rather than higher light positions will also create shorter shadow.
|
|
The Fill Light

|
This light is much less intense than the main, which is a good thing, because the fill light should not match or overpower the main light; it should be just enough to fill in the shadows as you see fit.
|
|
The Hair Light

|
The other light will be positioned above the subject and pointed down to strike her hair. Notice that the light doesn't have to be perfectly centered above her head, it's okay to have it off to one side a bit.
|
|
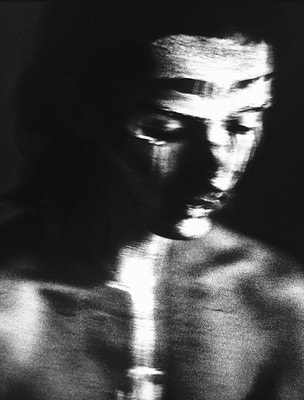
Myra Greene
Myra Greene wanted to explore how people of colour and how they are seen in society today and years beforeHer idea was to photograph separate features of her own face such as her eye, mouth. ear, lips etc, and print them onto ambrotypes, which is a process in which you print pictures onto glass. This technique was mainly used in the 1850's during slavery to photograph slaves, so she felt it connected with her.

|

|

|
My Response.
To try and re-create Myra Greens work I used tape to cover up certain parts of the sheet (mostly in the corners), I also used the technique of using a brush to splash the chemicals on the print to give it a distort look adding to the re-creation of Myra Greens work.


Best Edits:

|

|
Home response.
Dark room response


|

|
WWW:
EBI:
EBI:
LIGHT & SHADOW: VALERIE KABIS
Valerie Kabis - Is interested in how shapes are created by limiting light. By experimenting with light, shadow and variations in focus, Kabis creates a series of dark and thought provoking images.
Task 1: Digital
Shadow and Light Portrait Variation
Using the the work of Kabis for inspiration, I created a series of portraits in the studio. Experimenting with different lighting, backgrounds and effects. For example, studio lighting, phone torches, movement, blur, and long exposures.


Edited: For editing the photos I only used brightness and contrast edits and levels which all have an effect on the photo which best represents Kabi's work best.
Documentary Portrait.
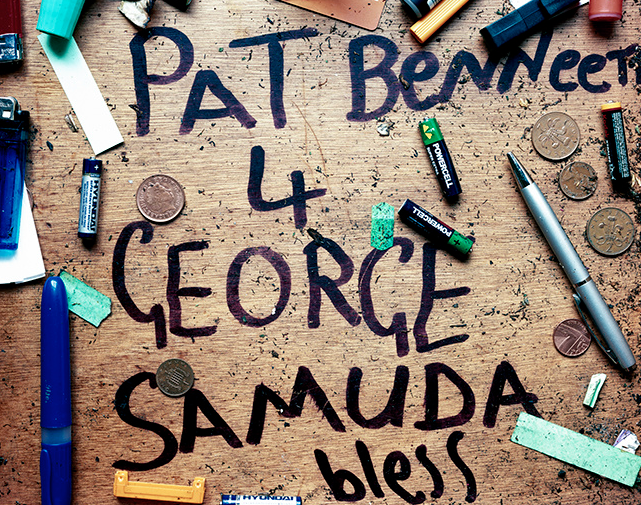
`George Town - Lewis Khan
"A friend, a neighbour, a familiar face in the street. Georgetown is a view into the life of south London resident, George. During a period of my adolescence that saw playing football in the street as a daily ritual, George and myself often shared the same space. Frequently we would meet with a simple nod, more frequently a hello, and on occasion George would join in for a kick about. Georgetown is informed by six years of these impromptu and informal meetings in the street, usually the same one Portraits can be taken anywhere and often the most powerful images are taken of everyday life. From the extraordinary to the mundane all subject matters can create exciting and inspiring photographs".
"A friend, a neighbour, a familiar face in the street. Georgetown is a view into the life of south London resident, George. During a period of my adolescence that saw playing football in the street as a daily ritual, George and myself often shared the same space. Frequently we would meet with a simple nod, more frequently a hello, and on occasion George would join in for a kick about. Georgetown is informed by six years of these impromptu and informal meetings in the street, usually the same one Portraits can be taken anywhere and often the most powerful images are taken of everyday life. From the extraordinary to the mundane all subject matters can create exciting and inspiring photographs".
|

|
|
Response
|
|
|
|
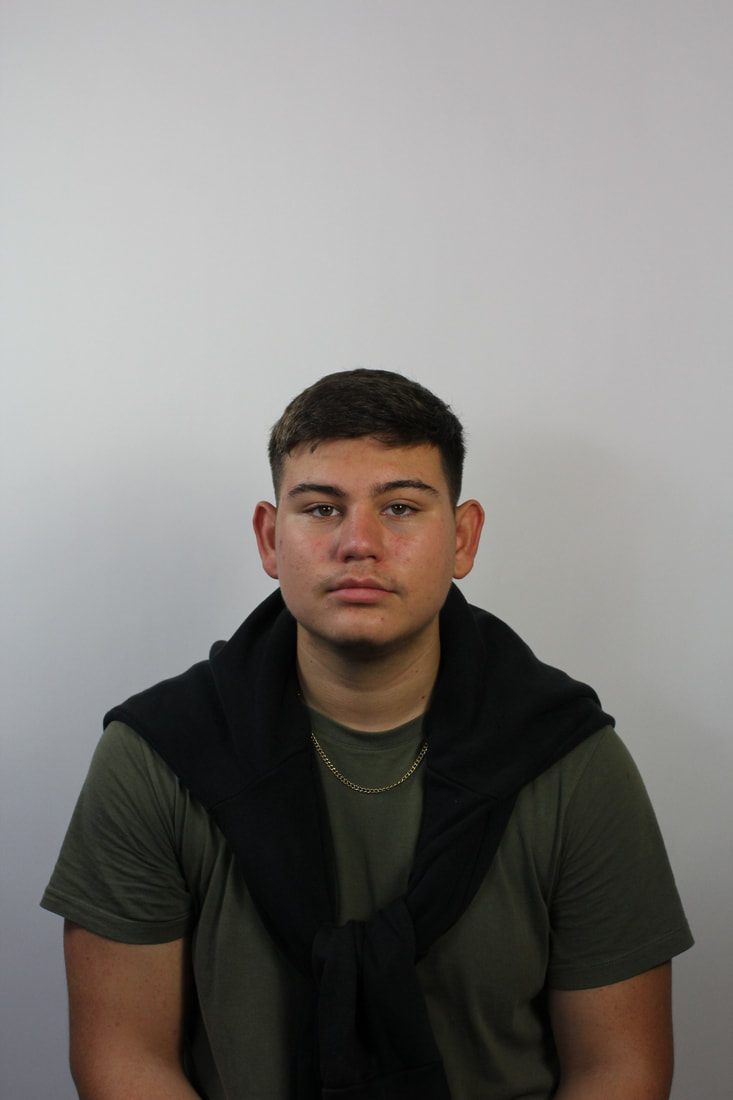
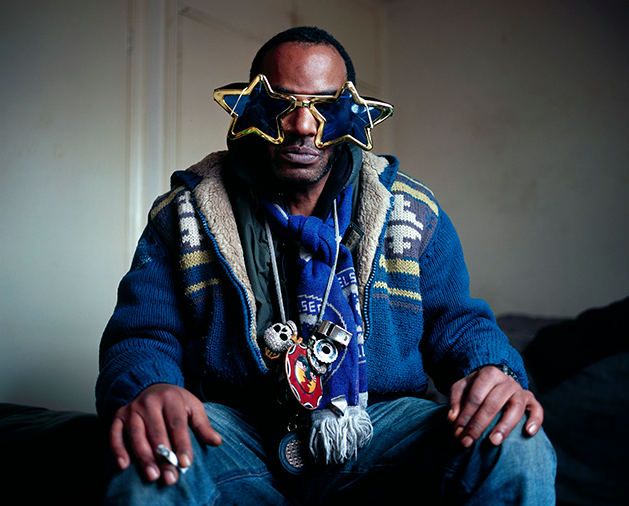
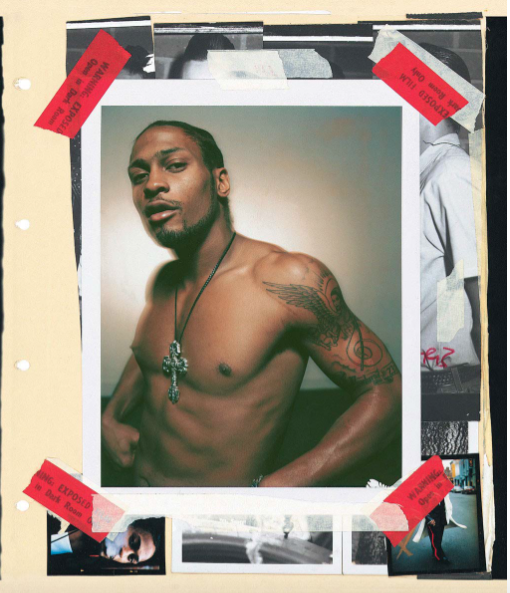
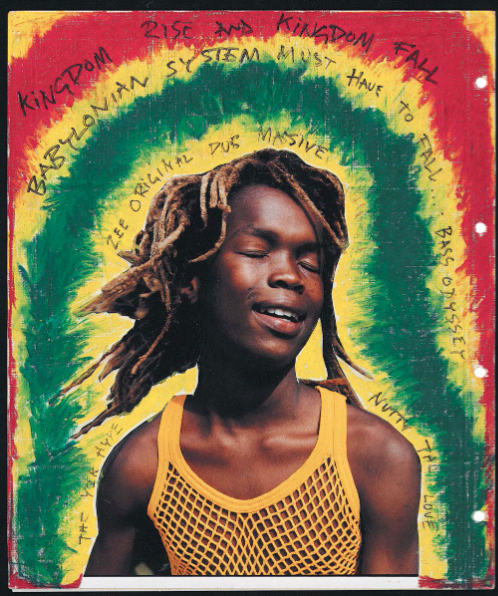
Ben Watts
The Big up Portrait
Ben Watts is a photographer born in London now based in New York, before his project Big Up he was a fashion/model photographer. Big Up is an impressive array of portraits featuring rappers, actors, boxers, dancers, skateboarders, children, and other street characters. London-born photographer Ben Watts started this collection in 1990 when he came to New York from the Sydney College of Arts. Fascinated by the faces and energy of New York’s urban youth culture, the book started as a collection of personal snapshots that continued to build over a dozen years. The photographs contain sharpie notes and tape alongside other mixed media that give the images a unique stylised look.
Ben Watts is a photographer born in London now based in New York, before his project Big Up he was a fashion/model photographer. Big Up is an impressive array of portraits featuring rappers, actors, boxers, dancers, skateboarders, children, and other street characters. London-born photographer Ben Watts started this collection in 1990 when he came to New York from the Sydney College of Arts. Fascinated by the faces and energy of New York’s urban youth culture, the book started as a collection of personal snapshots that continued to build over a dozen years. The photographs contain sharpie notes and tape alongside other mixed media that give the images a unique stylised look.
|
|
|
My Response

|
Personal response for Ben Watts

|
WWW:
EBI:
EBI:
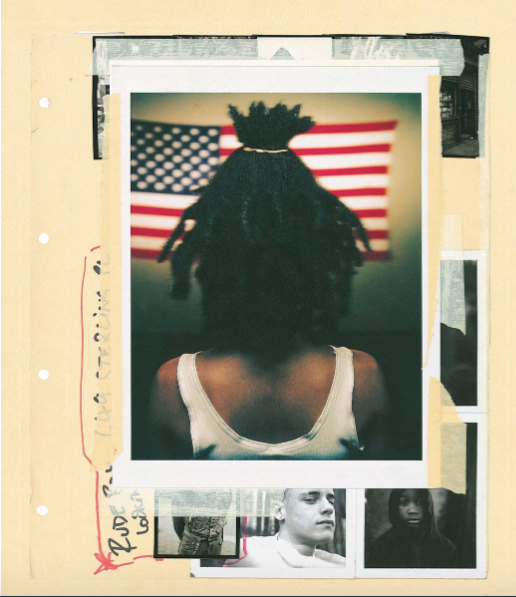
Lewis Khan: Independent Development
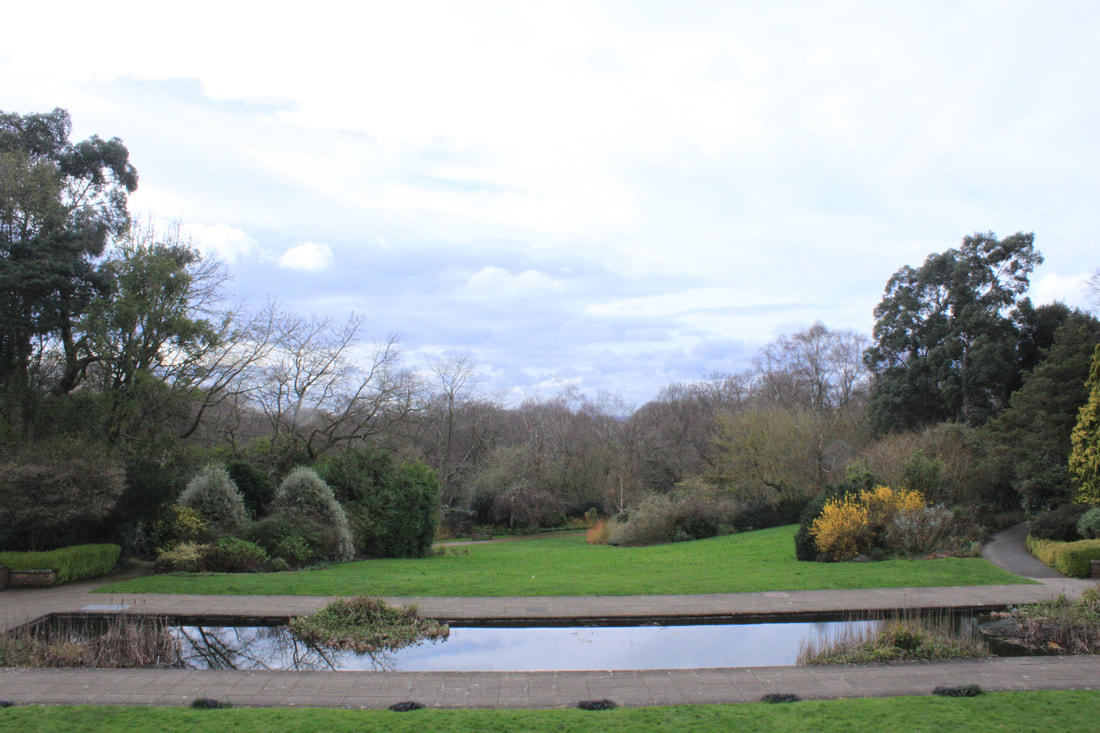
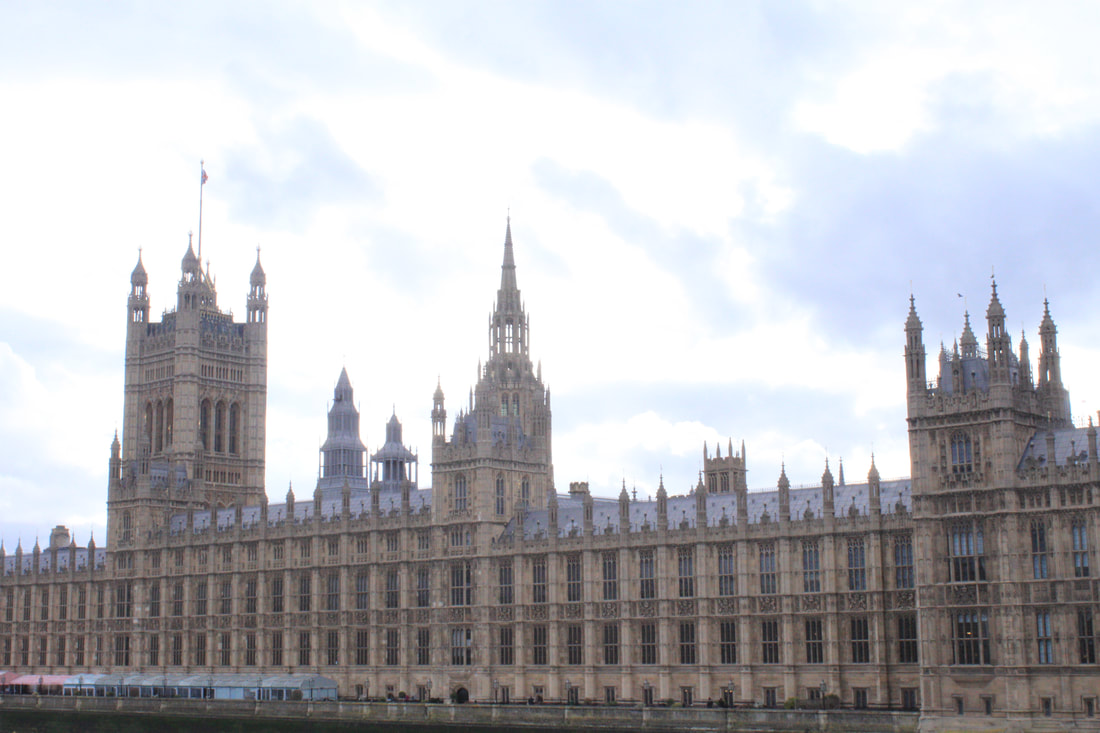
For my independent development I chose to develop Lewis Khans work. This time i chose to document the envoirnment more than just the person, this shows something that the person im photographing is into like a hobbie for example. One way i did this was by photographing my dad working on his olotment by taking shots far away to capture the envoirnment then coming in for a closer shot almost like the Myra Greene project.
Best Edits.
WWW:
EBI:
EBI:
