Pinterest Board: Brutalist Architecture
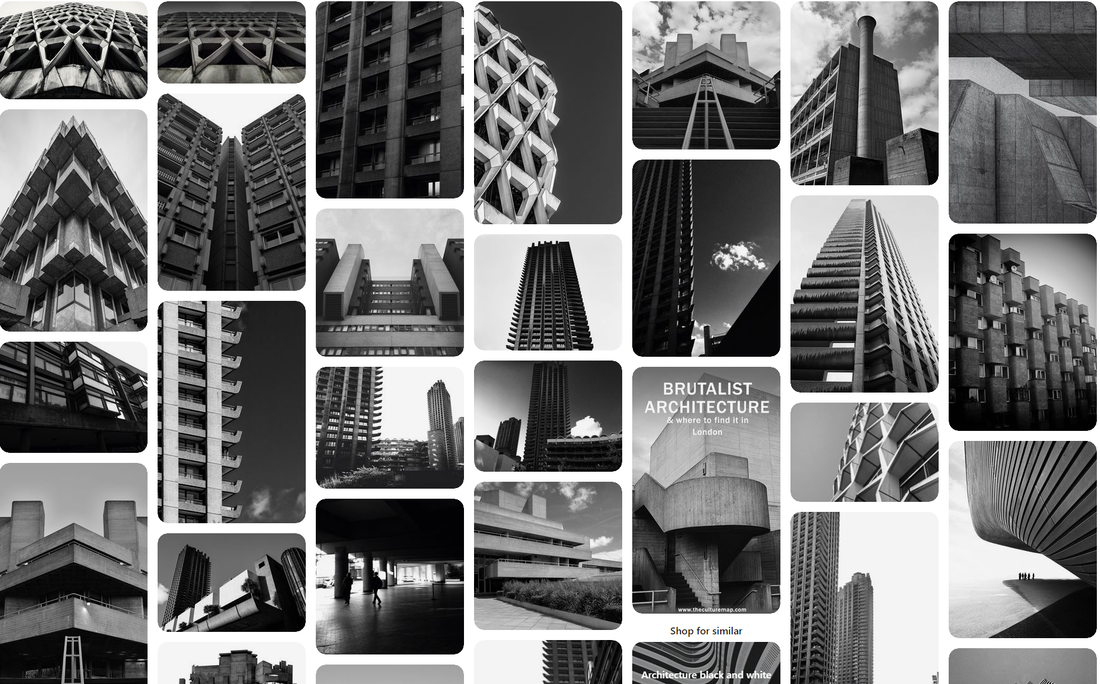
Brutalism is a architectural style made in the 1950s and is known for it's massive size with rigid, blocky shapes, usually formed in an abstract way and made using poured concrete. It's name comes from the French "beton brut", meaning raw concrete, while also having the wordplay of "brutal", referring to how the people in England felt when it was introduced. It's structure, consisting of unusual shapes and patterns, is a main feature that defines the Brutalist style, usually compared to what would be found in a dystopian landscape or fantasy.
Simon Phipps
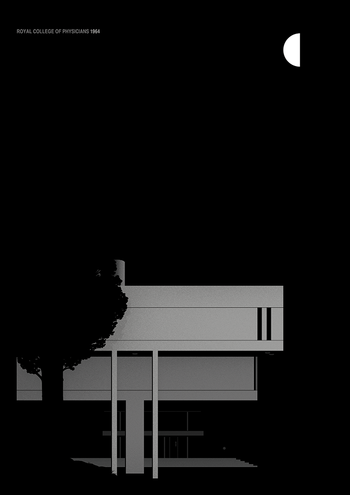
Simon Phipps is a photographer who has worked for over 20 years documenting Britain's rebuilding after the events of WWII, and is best known for his work photographing the brutalist architecture. He has numerous collections including "New Brutalism", "Brutal North". "Concrete Poetry", "Finding Brutalism", and "Brutal London".
His work:


|

|
My Response:
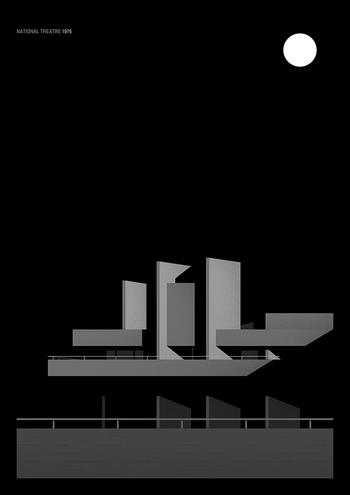
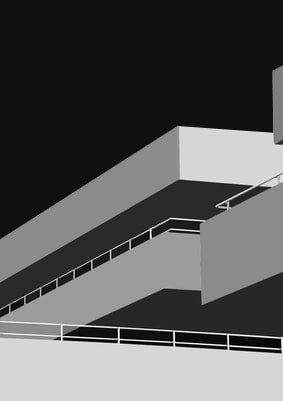
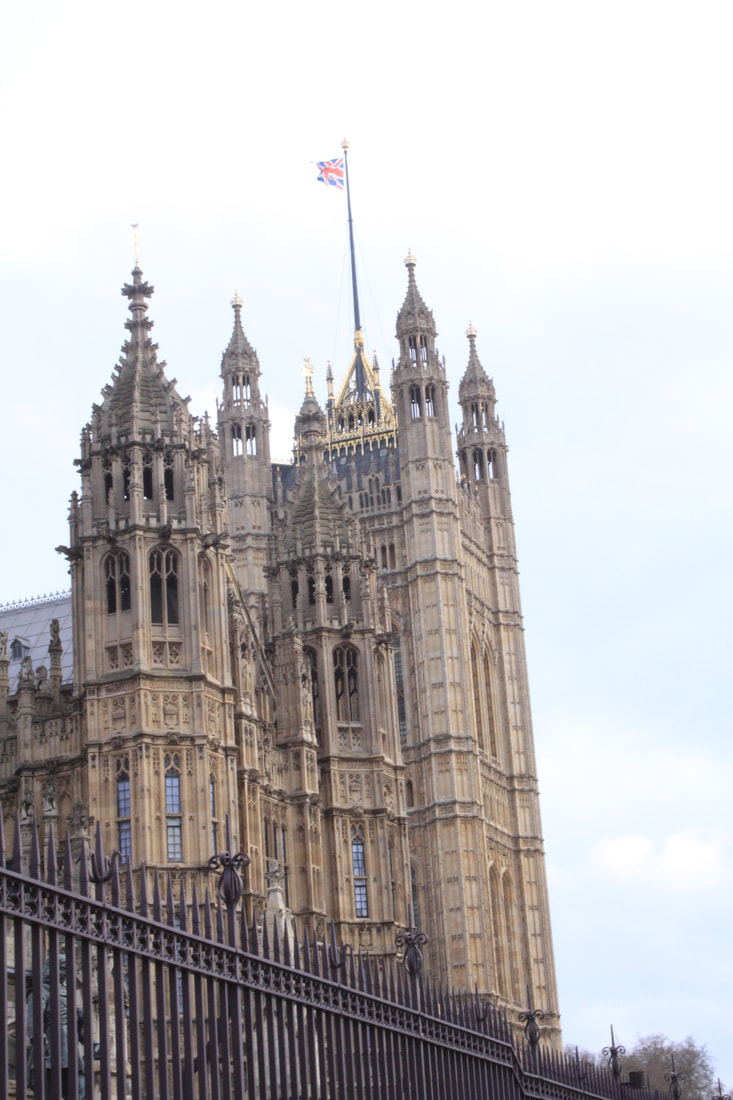
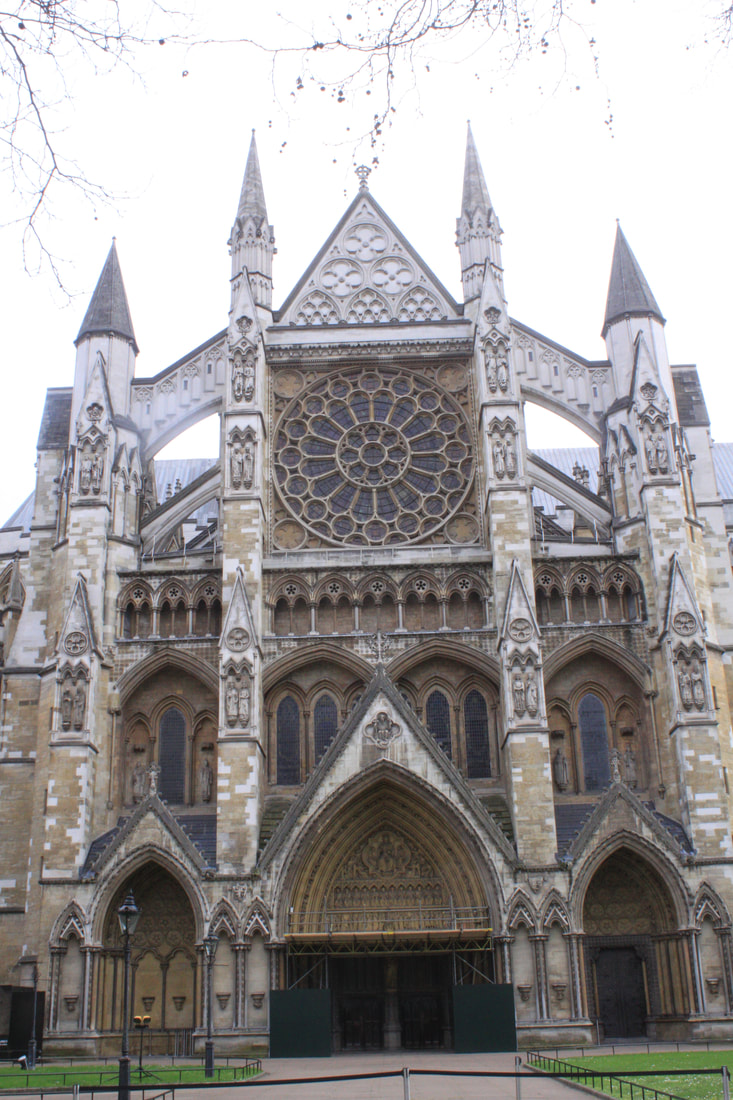
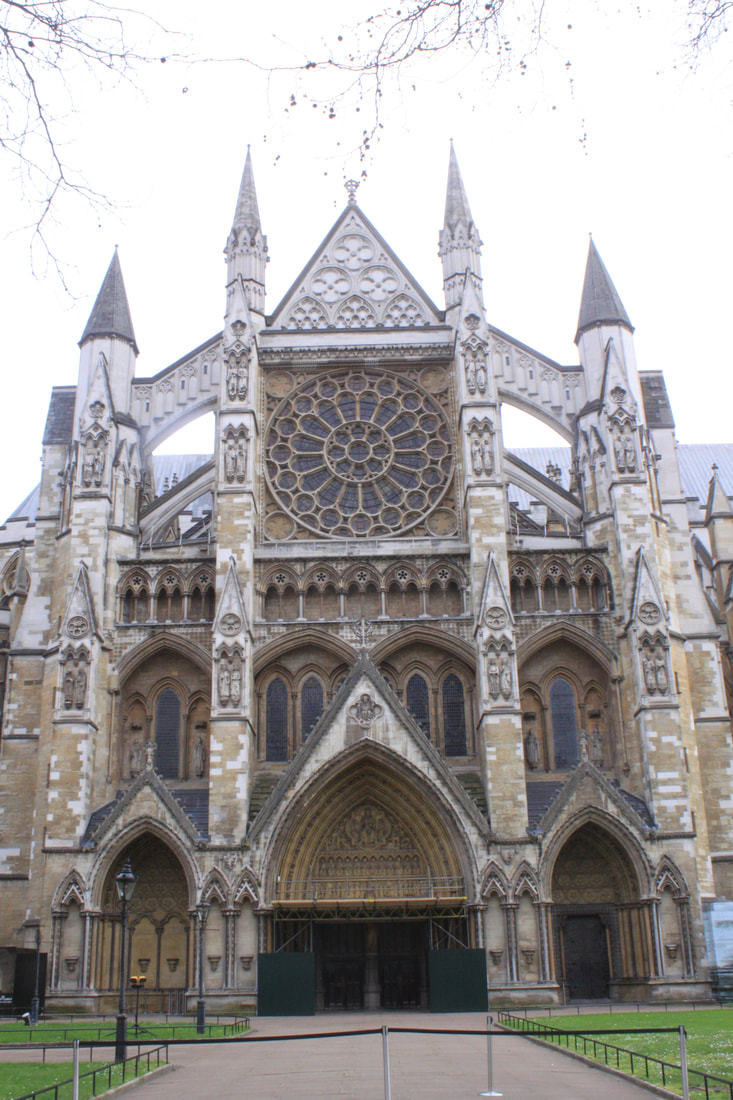
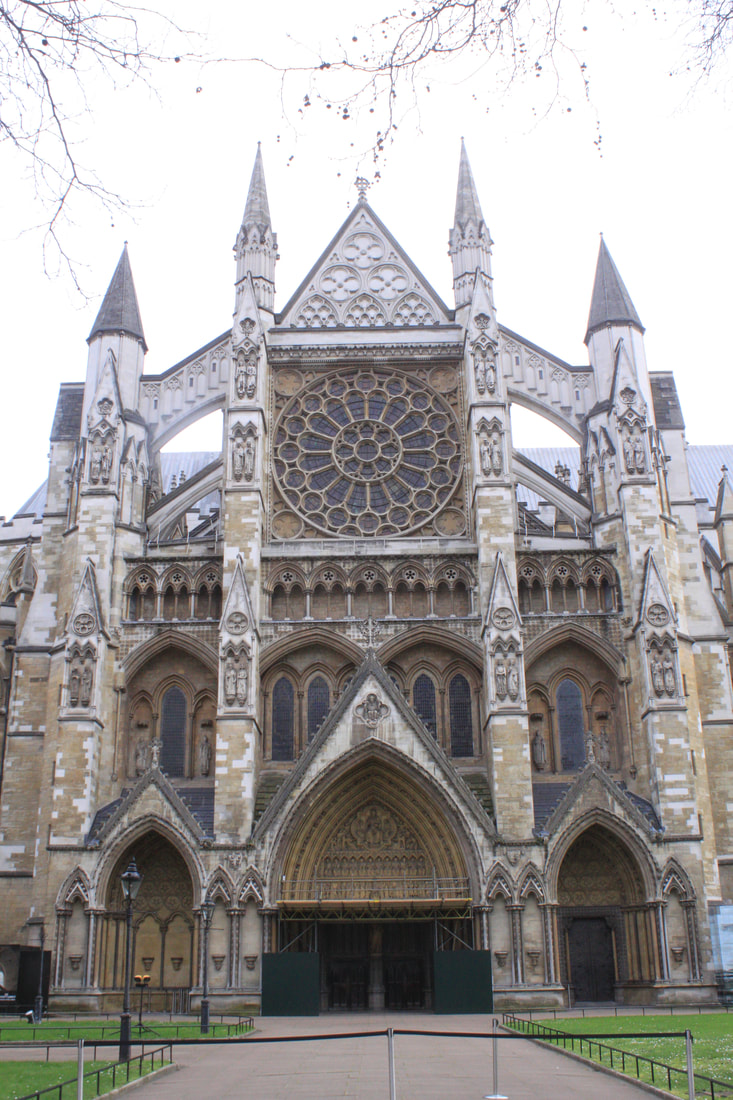
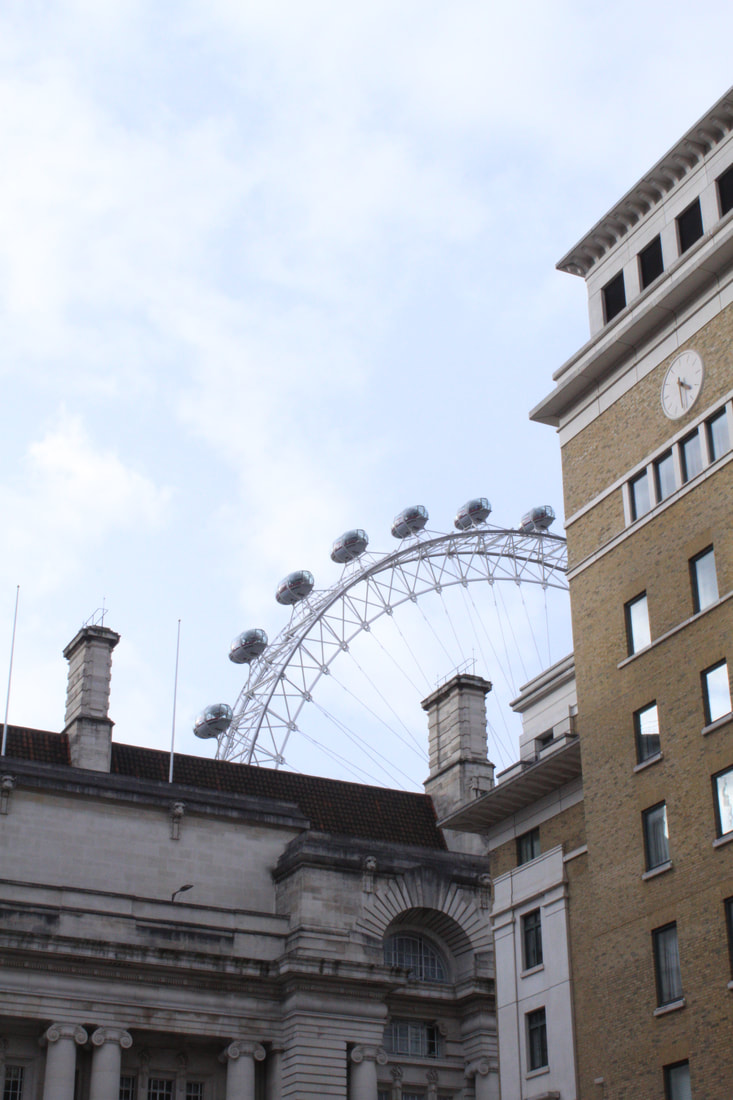
For my response i went down to the southbank to take pictures of the (building shown below) theatre there. I focused on symmerty and trying to get a lot of edges and just alot of building in the photo, so that when i edit them they will look a lot more filler. I also focused on perspective maybe photographing from below to make the building look gigantic or step back and allow for a wider view of the building
Best Edits:
Thomas Danthony
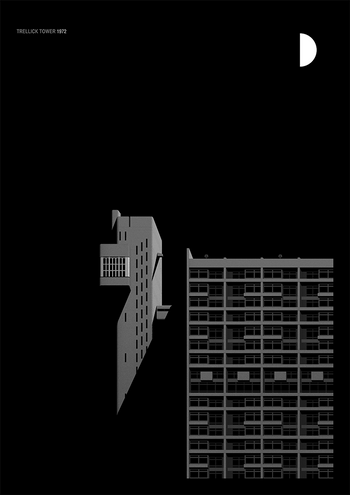
Thomas Dasnthony turns photographs that he has taken in to simplified images in Photoshop and then in turns creates screen prints of his creations. Im going to use my photos from the Simon Phipps response and use Thomas Danthonys editing technique into the photos.
|
|
|
My response
For the edits i went for turning the sky black like Thomas Danthonys work then turning into into a lighter colour to see the difference.


|


|

|
WWW: i like the difference between the black sky and the lighter sky, both of the colours still make the building stand out a lot more which i like. I also like the amount of detail in the edits, i tried my best to put as much detail in them. My favourite is the on furthest left.
EBI: Next time im going to maybe try and use some colours, seeing which colours work the best with each other. Also maybe my photos could have done with a little bit more detail.
EBI: Next time im going to maybe try and use some colours, seeing which colours work the best with each other. Also maybe my photos could have done with a little bit more detail.
Break the Structure - Thomas Kellner
Kellner's’ work imitates the wandering look of the eye, showing us segments of the total which come together as one image. Therefore his photographs do not necessarily deconstruct architecture but instead reconstruct our view of it. His work offers an alternative view of famous landmarks, one that intends to question our thoughts on how we visually process them and develop a sense of place.
Kellner uses the traditional process of film photography to create montages. Using just one roll of film, Kellner often takes images of the same landmarks or buildings of significance from different angles to later re-arrange them on a contact sheet and create a unique composition.
Kellner uses the traditional process of film photography to create montages. Using just one roll of film, Kellner often takes images of the same landmarks or buildings of significance from different angles to later re-arrange them on a contact sheet and create a unique composition.
Twisted structure - Nicholas Kennedy Sitton
NICHOLAS KENNEDY SITTON-
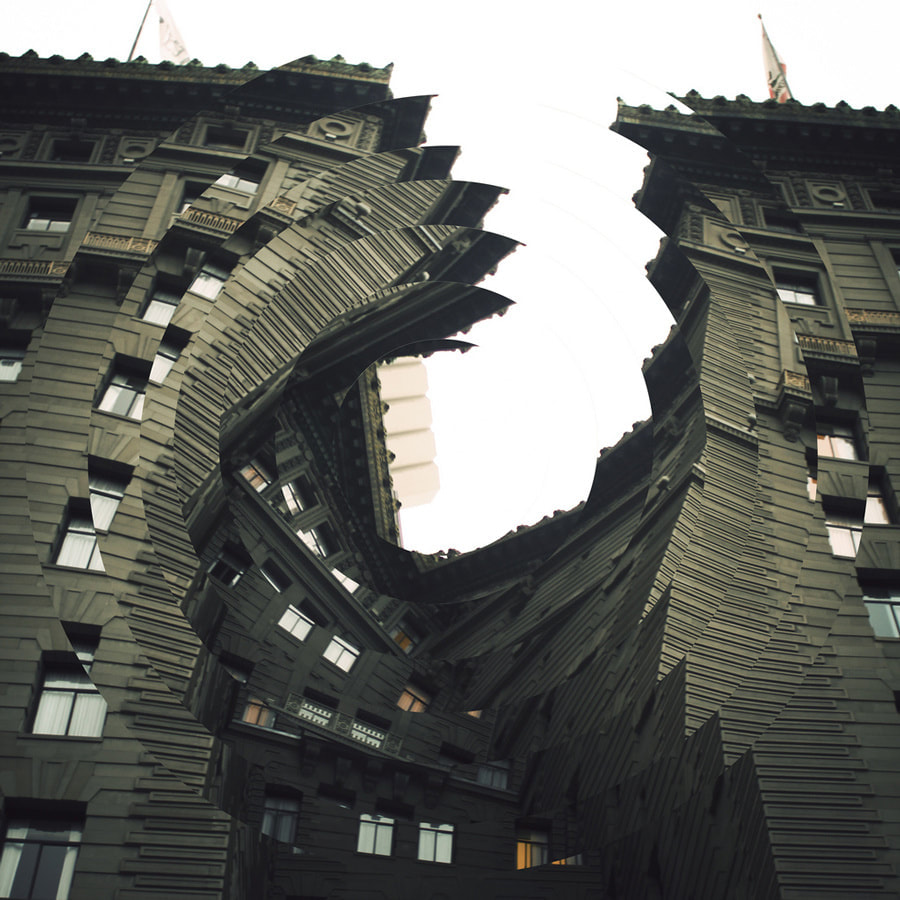
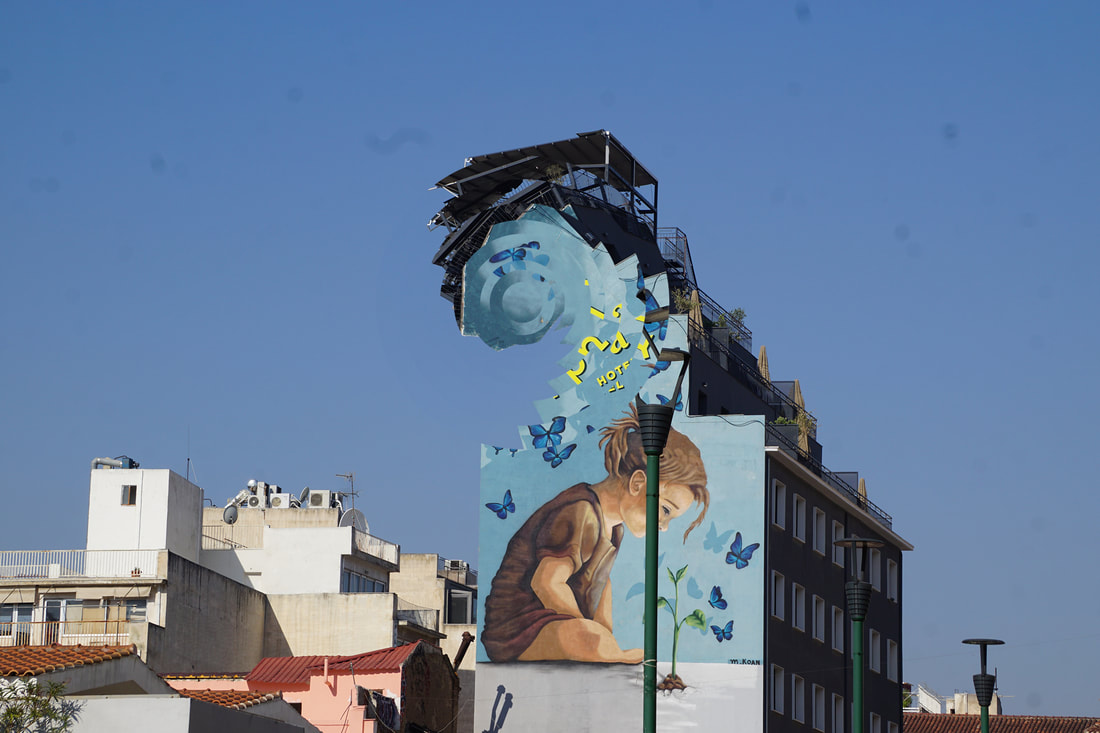
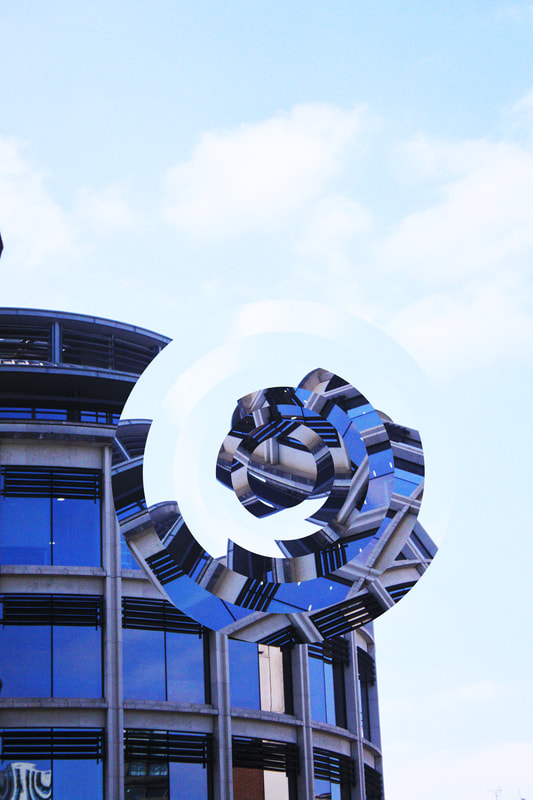
Sitton is a San Francisco based artist, whose work is made using film photography and photo manipulation - using images of urban structures that he twists and swivels to create alternate viewpoints. To create a disturbed feeling of the surreal, Sitton contrasts the point of disruption with an otherwise typical scene. He encourages his viewers to embrace their imagination while questioning what is real and what is not.
Sitton is a San Francisco based artist, whose work is made using film photography and photo manipulation - using images of urban structures that he twists and swivels to create alternate viewpoints. To create a disturbed feeling of the surreal, Sitton contrasts the point of disruption with an otherwise typical scene. He encourages his viewers to embrace their imagination while questioning what is real and what is not.
|


|
My Response-
For my edits i picked to past pictures i had taken, i then used the elliptical markie tool to draw a circle out then i just rotated each circle as i moved further into the centre of the circle. I tried to focus on drawing into a certain part of the building for example on the image just belwo i focused on getting the words that where on the wall into the circles, to distort it more, add more "things" into the circle.
Overall I was happy with the results of my edits. I enjoyed marking out where to create the breaking of the structure and also in which direction. Next time I would probably edit more images to see other ways I could break the structure, for example breaking it down into squares.
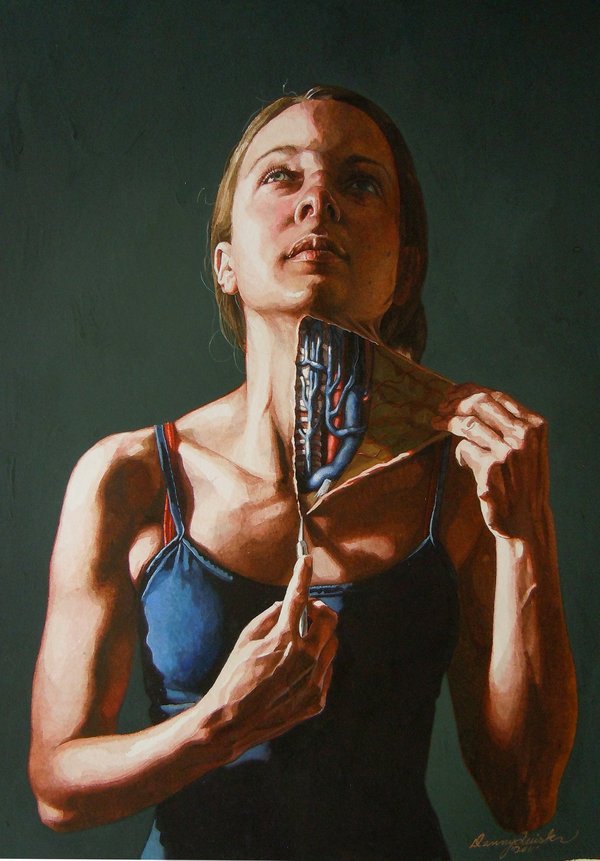
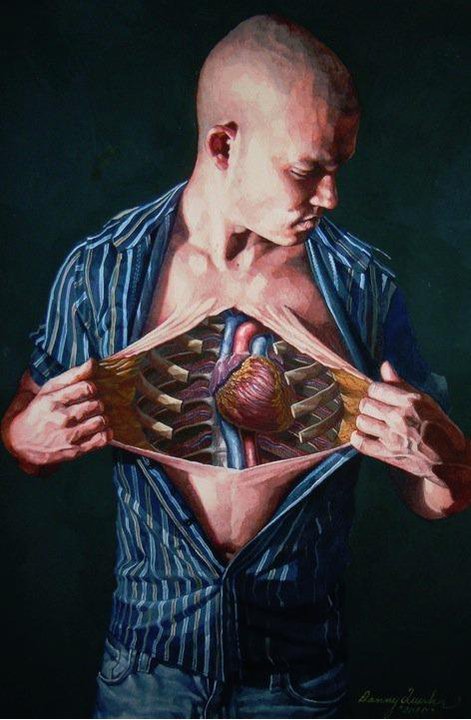
Structure of the Body
The body is made up of multiple layers and has an amazingly complex structure many artists have investigated the different parts and layers that make up this unique structure. Danny Quirk is an artist who specializes in photo realistic watercolors and painting what the camera can’t capture (below).
|
|

|
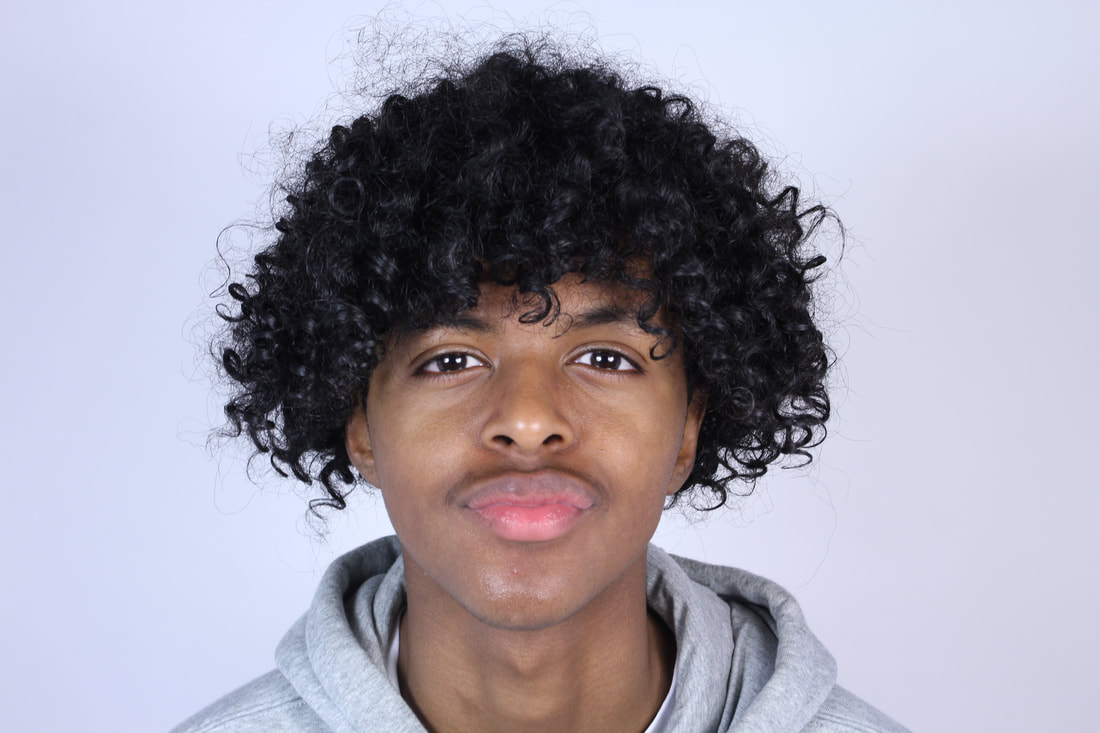
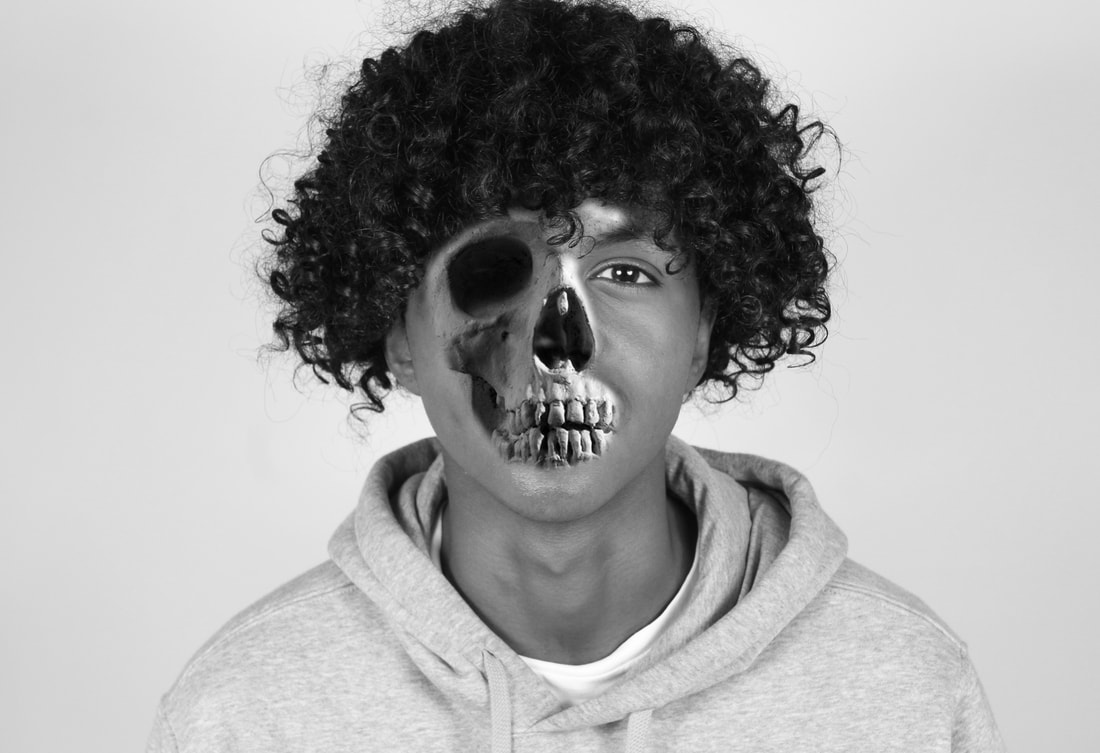
My Response: For my response I used the skeleton and bones in the studio and photographed them on a white background. Then I took a series of portraits of your classmates and then used photoshop and other experimental techniques to merge the portraits with the skeletons and bones.
|
Original:
|
Edited:
|
My final edited image was
Structue in nature - Myoung Ho Lee


|
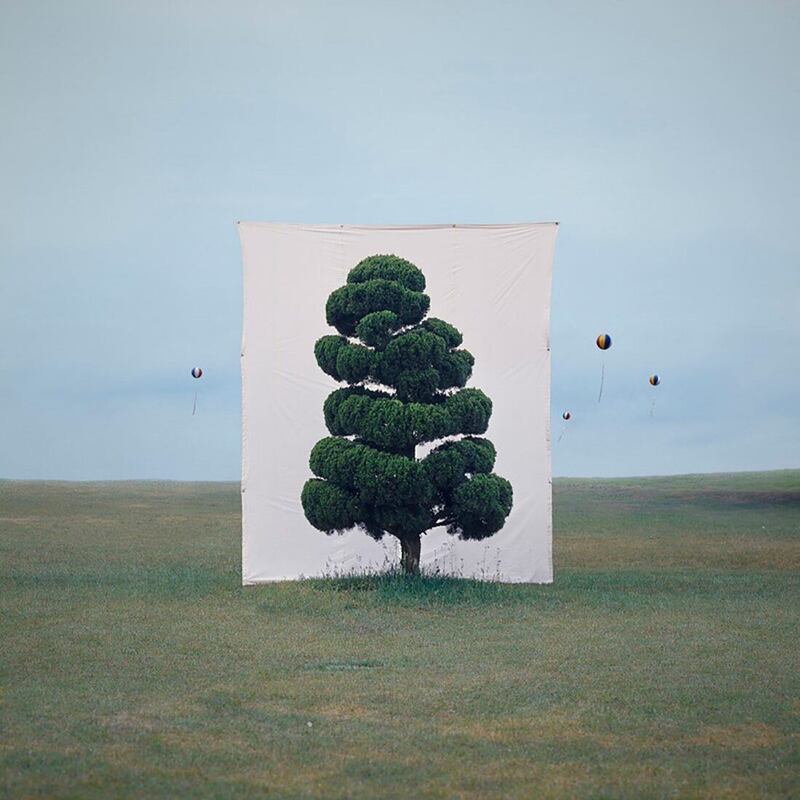
Myoung Ho Lee is an artist from South Korea, who has created a series of images that feature simplified trees in a natural environment. His work makes the viewer look at the tree in its natural surroundings, but raises questions about environment, reality, art and representation. This use of a clean white background creates separation and difference between subject and image. The process of his work can be broken down into four steps. First, the subject must be selected, then it will be separated from its environment artificially - with the white background - then photographed, and lastly he 'confirms the creation of identical chaos to the ‘Photography-Act’ itself by this separation and decontextualization.'
|
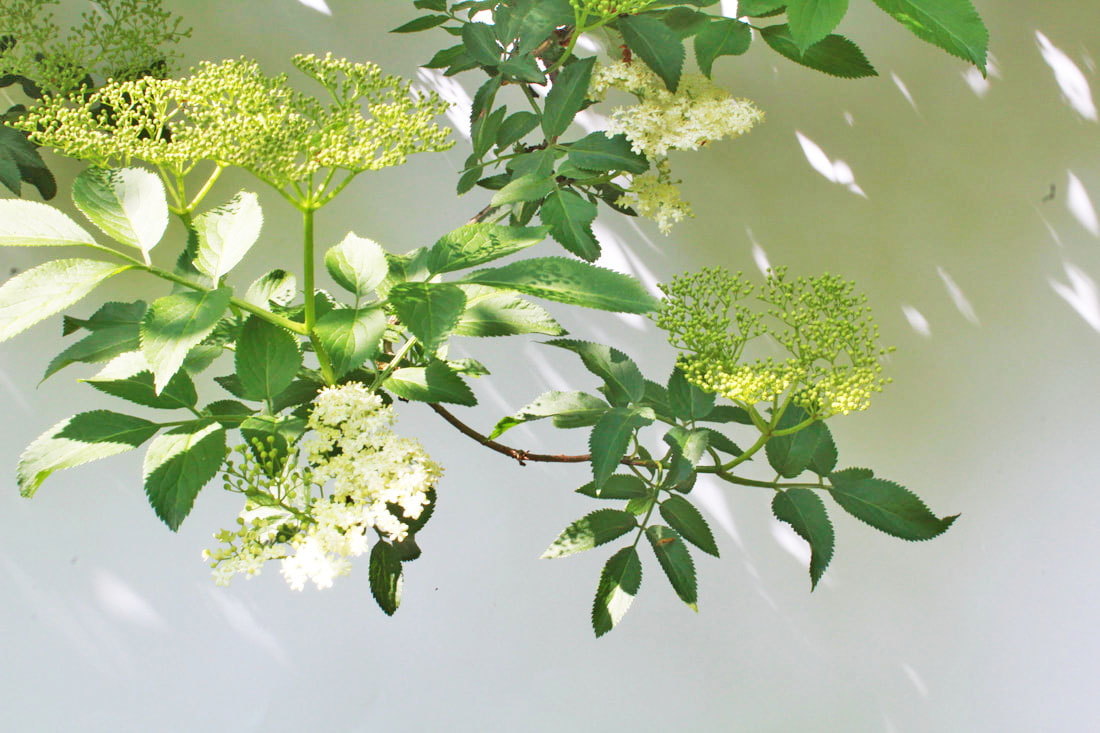
My responses -
Best Edits-

|

|
I really enjoyed this project, finding different plants to photograph against a white background and using light to enhance the structure of the plant was enjoyable. My favourite image is the one in the top left corner, I like how the light is lighting up parts of the plant revealing a different type of structure compared to the darker spots. I believe I also responded well to the photographers work in comparison. Next time I would probably stay out longer and look for more plants and flowers to photograph.
Independent Developments
For my independent development i am going to choose from 3 photographers and respond to their work, then choose my favourite "strand" and develop it further using my own ideas, creating my own type of photography on stucture with the base of a certain photographer.
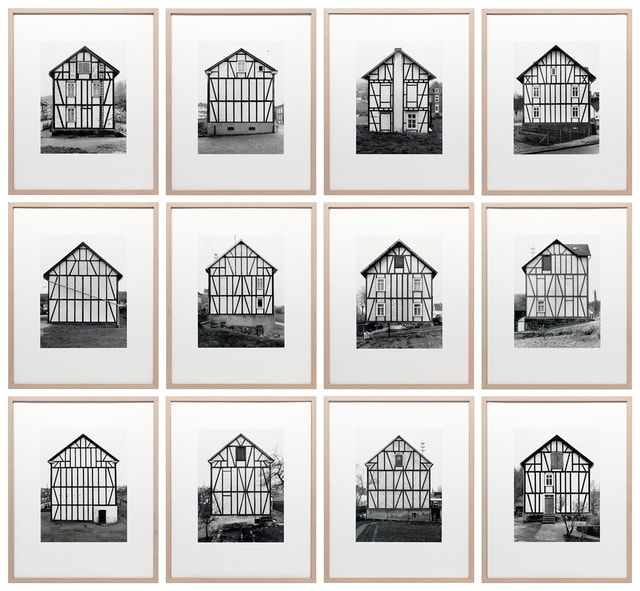
Strand 1 - brend and hilla becher
Bernhard "Bernd" Becher, and Hilla Becher, née Wobeser, were German conceptual artists and photographers working as a collaborative duo. They are best known for their extensive series of photographic images, or typologies, of industrial buildings and structures, often organised in grids. For close to fifty years, they documented architectural forms they collectively referred to as “anonymous sculpture.” Their extensive series of water towers, blast furnaces, coal mine tipples, framework houses of mine workers, and other vernacular industrial architecture—often technologies on the verge of obsolescence—comprise an in-depth study of the intricate relationship between form and function.

|
|

|
My responses -
For my response I'm going to go into central London and photograph structures that are the same but different for example, I've chosen to photograph under all the different bridges in London. Another response I'm going to try is photographing the inside of tubes that have different interiors. Then for editing I'm going to change them to black and white to represent the industrial way that Brend and Hilla Becher photographed there photos and them put all of the images in a contact sheet.


Final Edit:
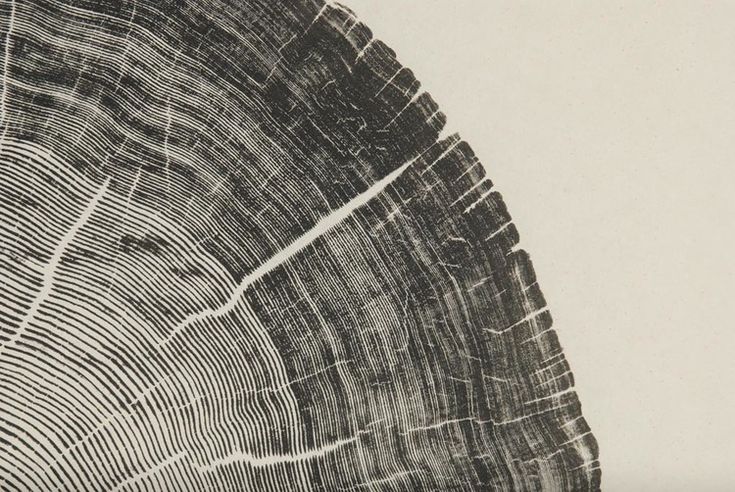
strand 2 - brian nash gill
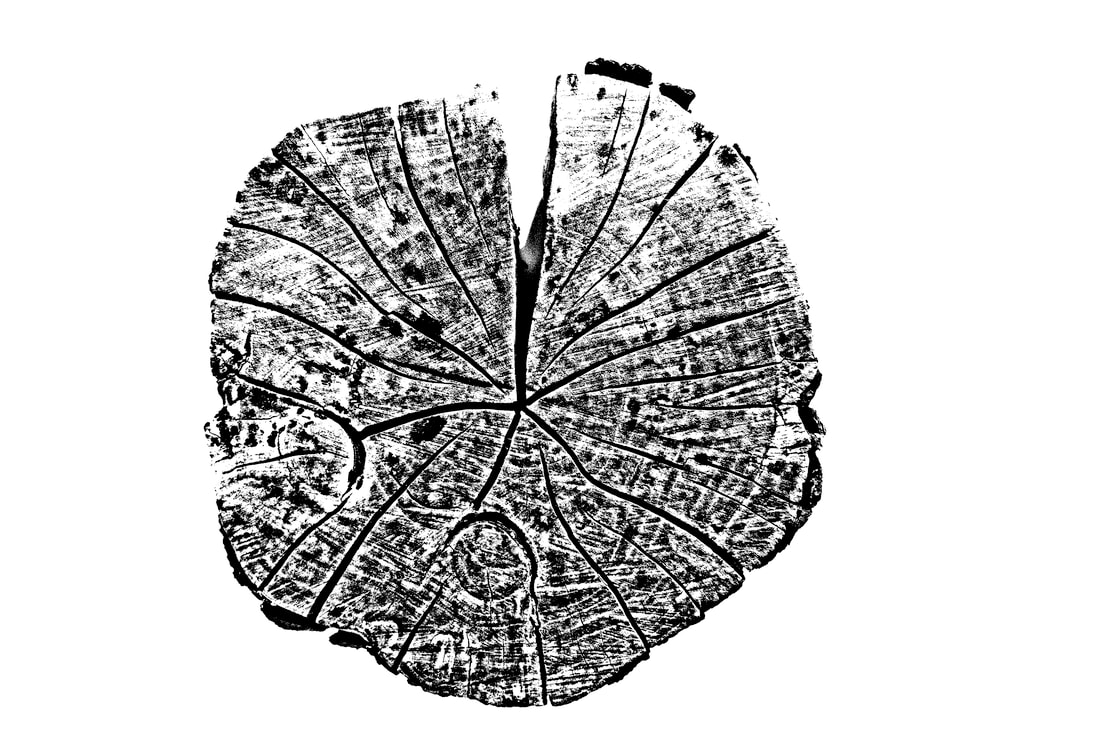
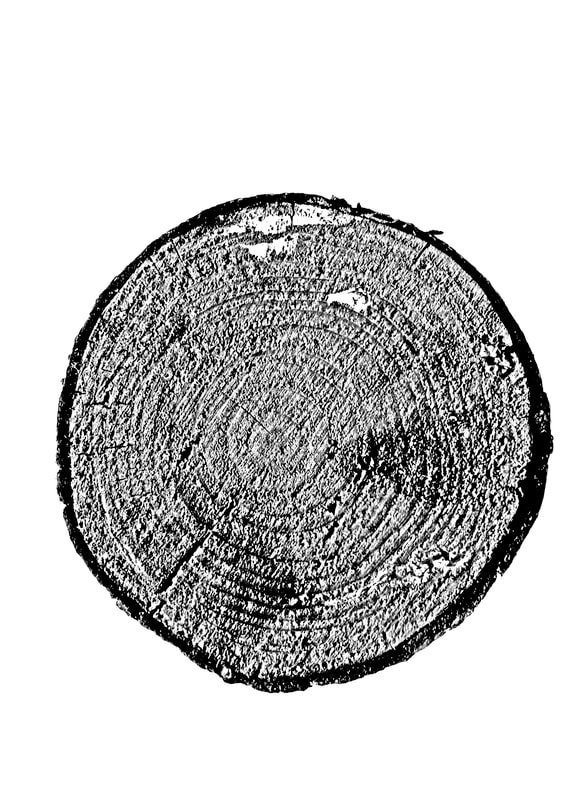
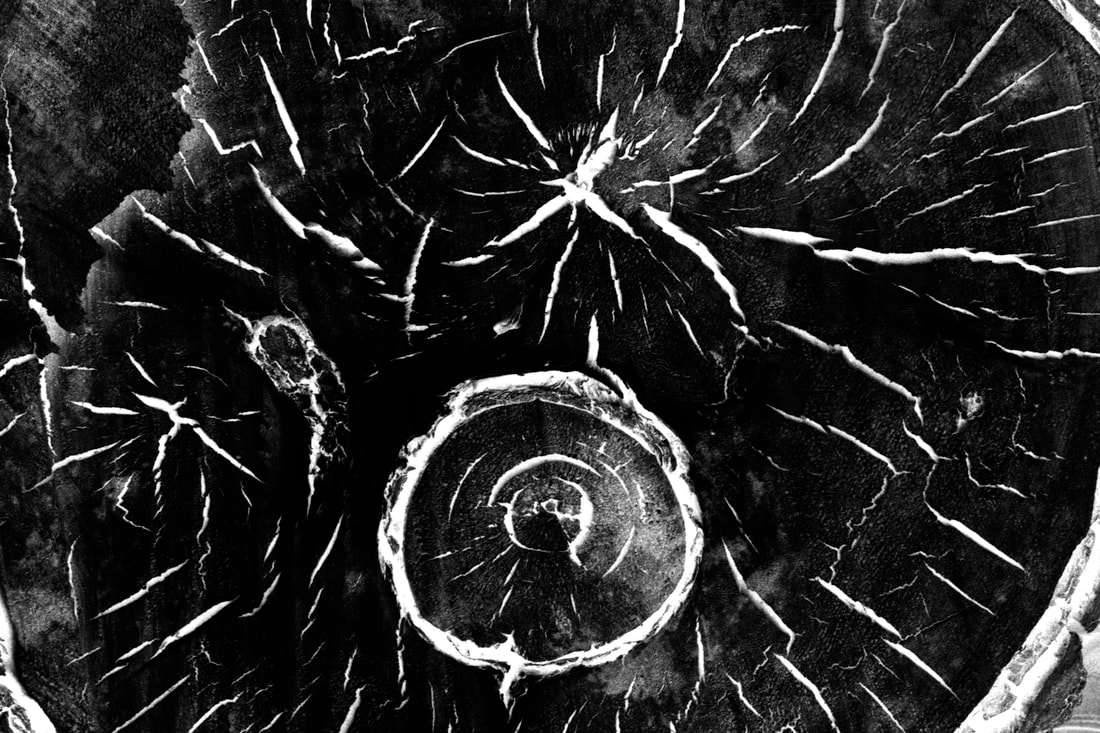
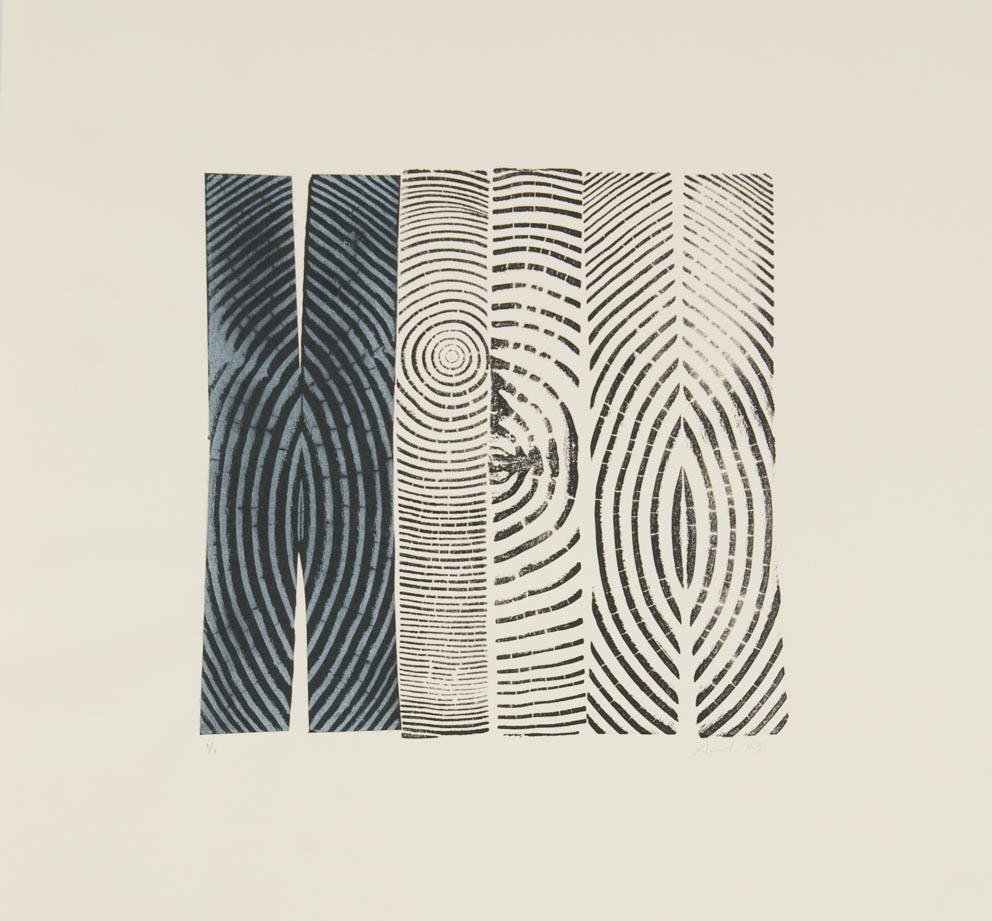
Bryan Nash Gill is Best Known for his prints taken from tree trunks/logs, capturing all the detail of the pieces of wood including the inner rings and outer bark layers. These Prints really caught my eye as they are so simple but so successful. I was drawn to the different sizes of logs and tree cuts he uses to print from and how much detail he captures into the result. Gill used recycled lumber, covered it with ink and paper and pressed and scratched the wood pattern on the paper with his fingers.

|


|
My response:
For my response, I am going to go out into the woods and look for different textures and patterns on trees leaves then photograph some against the ground and then some against a white background, then i will edit the photos in phototshop to produce the same work as Brian. I'm also going to focus on line and the structure of the piece of nature to really show the whole structure of the object. Also focusing on other types of structure within the log itself.
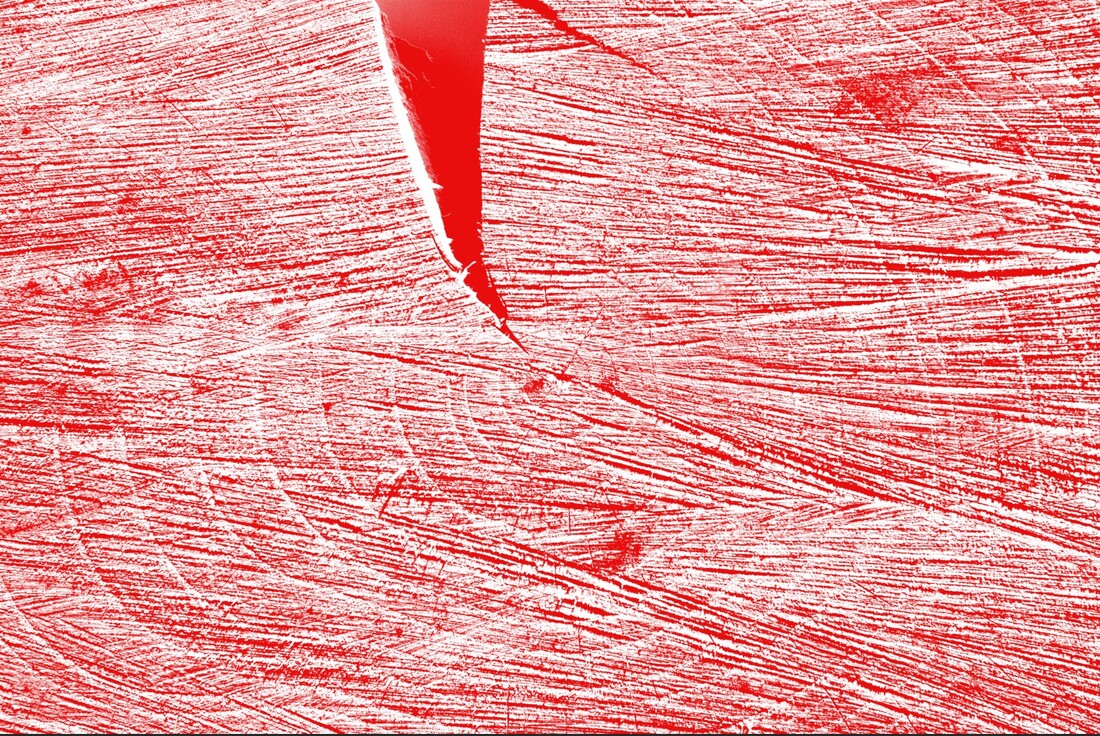
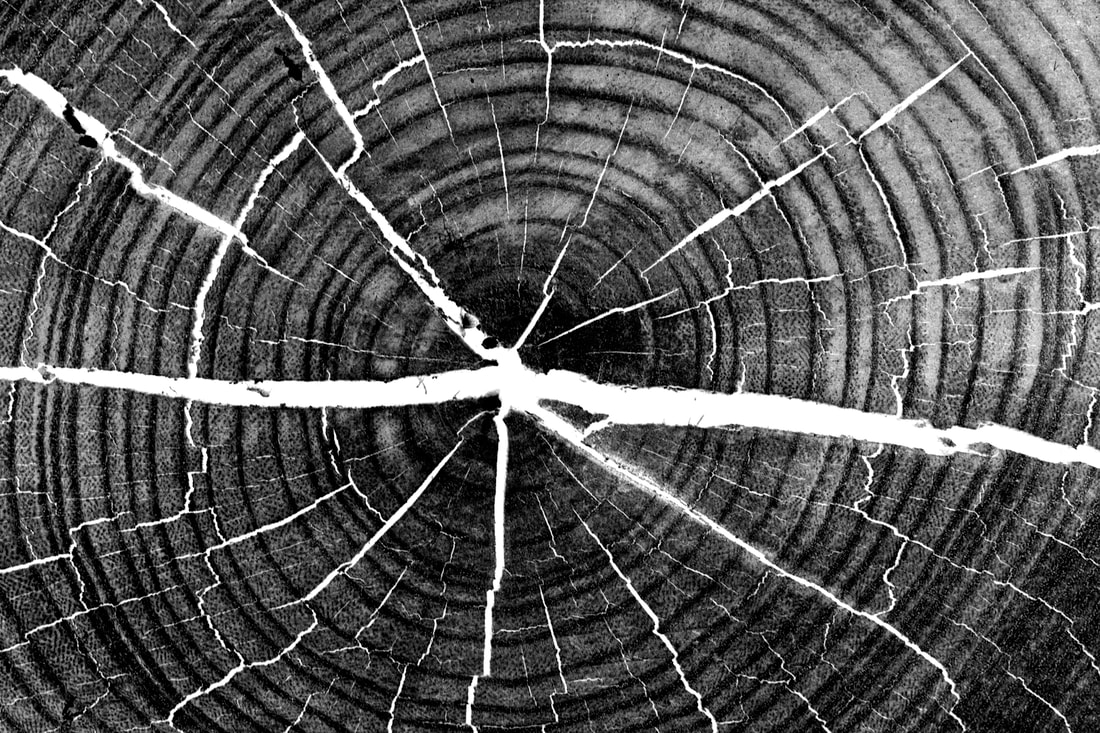
Edits: With my edits i used a range of techniques to try and re-create Brian Nash Gills work. Firstly i used the threshold tool which gave the photo seen on the top left has created, i think this editing tool helped a lot with the outcome as it gave it the sense of it being a print like Brian Nash Gills work is. Then i used the invert tool which is supposed to be used to prepare a photo to be worked on in the darkroom, however i felt that it would work with my response( the phots are the two bottom left). Thankfully they did, it helped bring the structure out of the half cut log, with the circles in the log popping out a lot more. Finally i used the duotone tool which can be used after turning the image black and white you can place colour onto the photo with duotone. I think this helped create a good representation of Gills work, which had colour in them, my image (second down on the left) still showed the structure as well in the image
|

|
Evaluation: I'm very happy with my outcome, all the editing tools I used were successful in creating the type of image I wanted that represented Brian Nash Gills work best. I think I will develop this strand therefore.
Strand 3 - gordon magnin
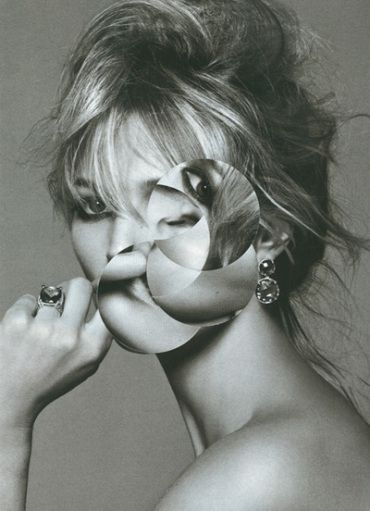
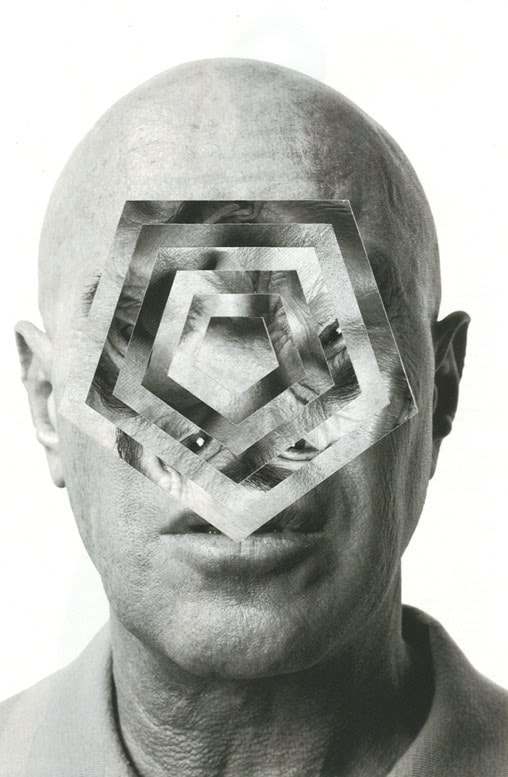
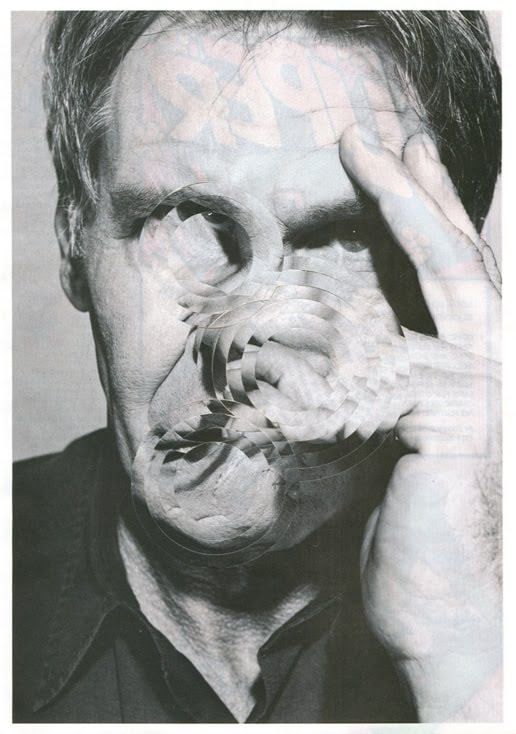
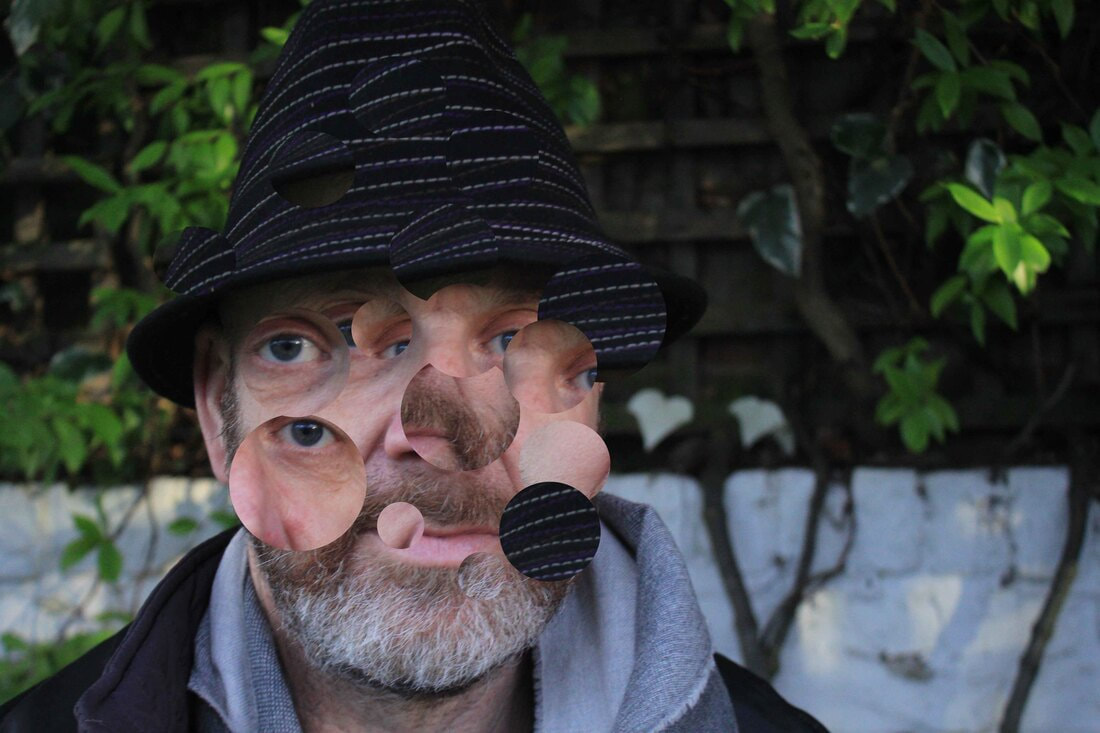
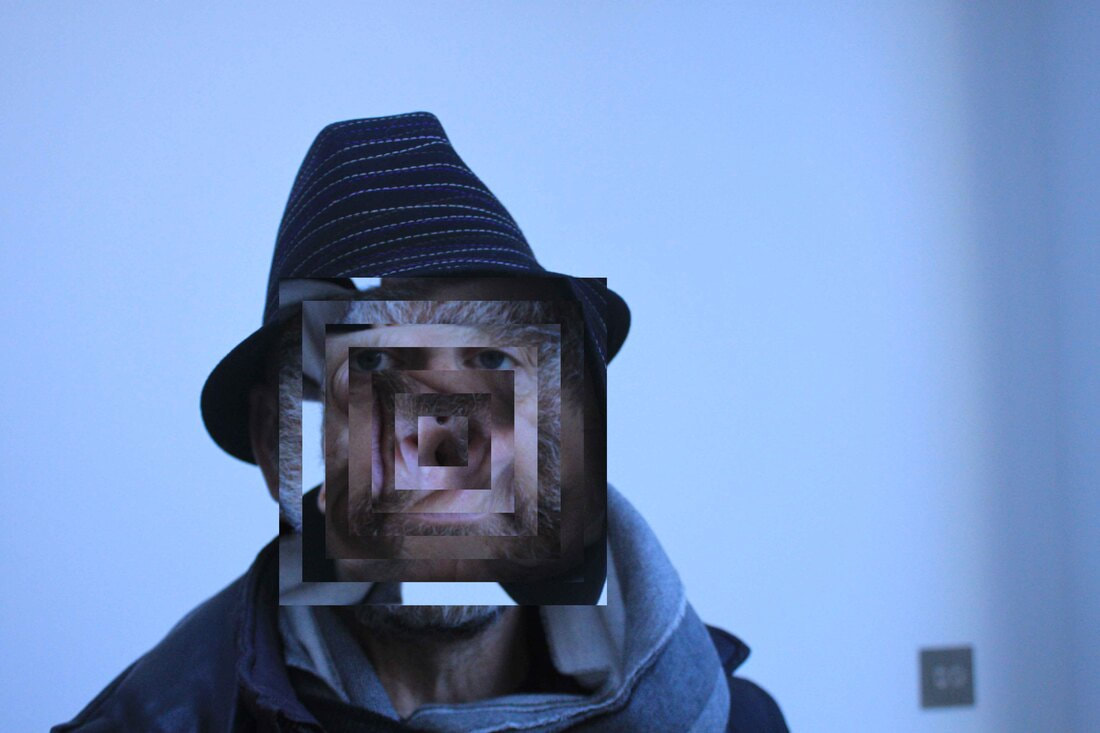
Gordon Magnin is a Nevada based artist who works in photography, scans, collage, and altered found image. Magnin’s interest lies in the inventive use of geometry, pattern, repetition, form, perspective, composition, and systematic operations as methods to distort and challenge the intended objective, interpretation, and significance of consumer based images. Magnin usually uses different portraits and cuts geometrical shapes out. Then he rotates them in a variety of ways to create a new image, with a new personality. He creates a puzzle for the audience to create with their mind.
|
|
|
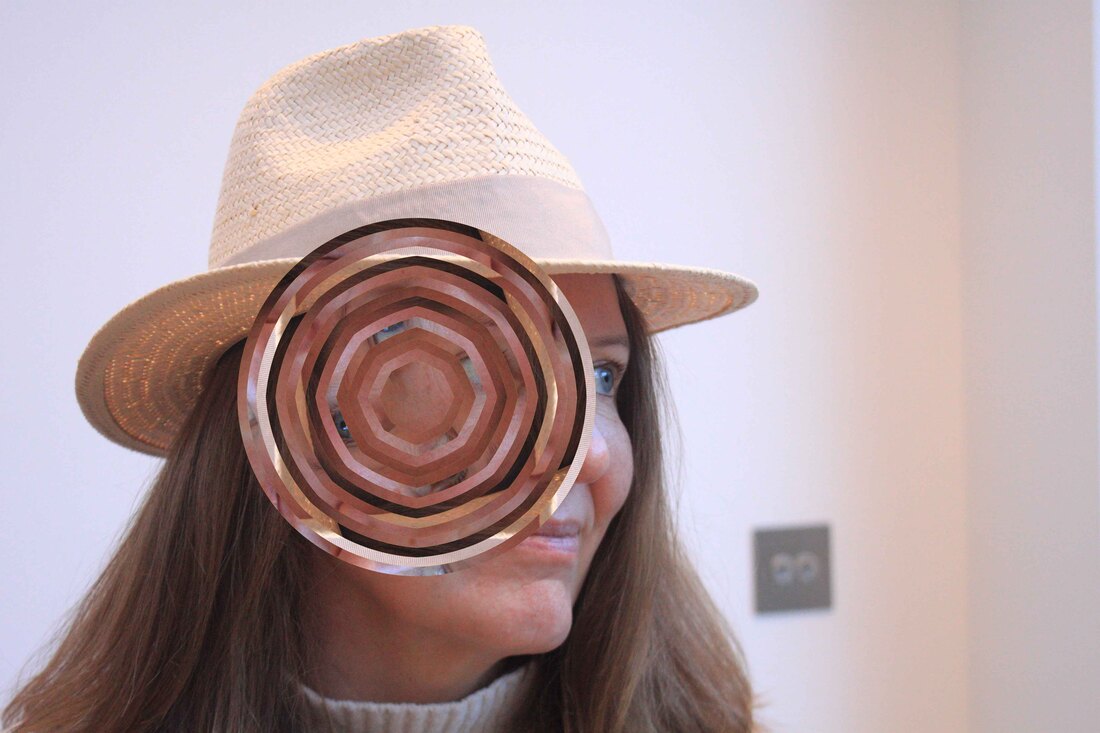
For my response I am going to photograph my final members faces, focusing on different angles maybe involving some hands arms over the face etc as Magnin has done in the images above. For my edits i am going to use the same technique that Magnin uses ( it is the same editing technique as the twisted Structure project just above). Im going to try and use different shapes in the edits aswell to see maybe if i could mitch and match them.
Response:
Response:


Edits:
|
|
|
|
Edited as a Gif:
|
How I did this:
|
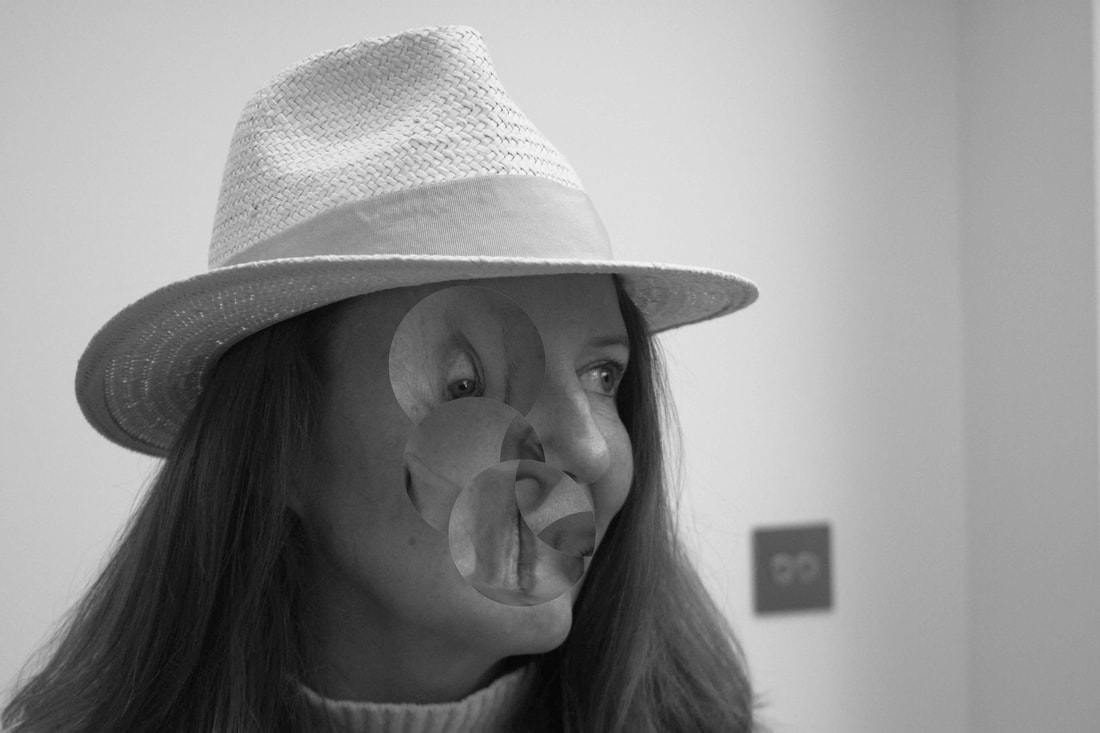
Overall I was happy with my images. I also think the GIF I created just added to that breaking of the structure with the movement of the shapes. My use of different shapes was also a good addition in experimenting with shapes to create structure. Next time I would probably take more images of more people to edit and also experiment with a coloured background swell to enhance the face.
Favourite strand
further devloped
Now i am going to pick my favourite strand out of the three I have done, then I'm going to develop the strand using my own photography skills and ideas whilst also keeping the content of the artist that I have chosen.
Developed Strand - Brian nash gill

|
|

|
My Ideas: To develop this work I'm going to firstly take my original photos responding to his work and take them into the dark room and see the results. I'm also going to experiment with other natural structures for example fruit and vegetables. I will take these and use the lightbox, other cut-outs to make the structure of the object I've chosen stand out, and represent Brian Nash Gills work in some way. I will also experiment using photoshop, using different techniques that help the structure stand out as much as possible, like Brains print of wood.
1st devlelopment: Dark room
For my first development I am going to bring my original photos from my strand response to Gill and bring them into the dark room and experiment using different amounts of time I expose the light onto the images as well, to see how I can make the structure stand out as much as possible.
Response:
Response:


Evaluation:
I am Mostly happy with the outcome of the dark room however I don't think it helped capture the structure of the wood as much as I would have liked. So for my next development I'm going to look at different ways i can capture the structure of natural objects. By using diferent lighting set ups and different objects.
I am Mostly happy with the outcome of the dark room however I don't think it helped capture the structure of the wood as much as I would have liked. So for my next development I'm going to look at different ways i can capture the structure of natural objects. By using diferent lighting set ups and different objects.
2nd development :
For my second development I have decided to reflect on my past development and look at other ways to capture the structure in different objects. For this development I'm going to look at the structure of different vegetables and fruits. To do this I used different amount of light to manipulate the way it looked, and placing the vegetable at different angles for example close up or only a small section of the object.
Response:
Response:


Best Edits:
|
For these sets of edits i just used normal editing techniques i.e. brightness/contrast, shadows/highlights etc to express the structure.


|
For these edits i used the threshold editing tool to get rid of the colour and make the structure stand out a lot more.


|
Evaluation: My edits especially felt great. The invert tool worked really well in bringing out the lines in the mushroom. However next I want to experiment with colour and maybe more of the object or objects in singular shot.
3rd development :
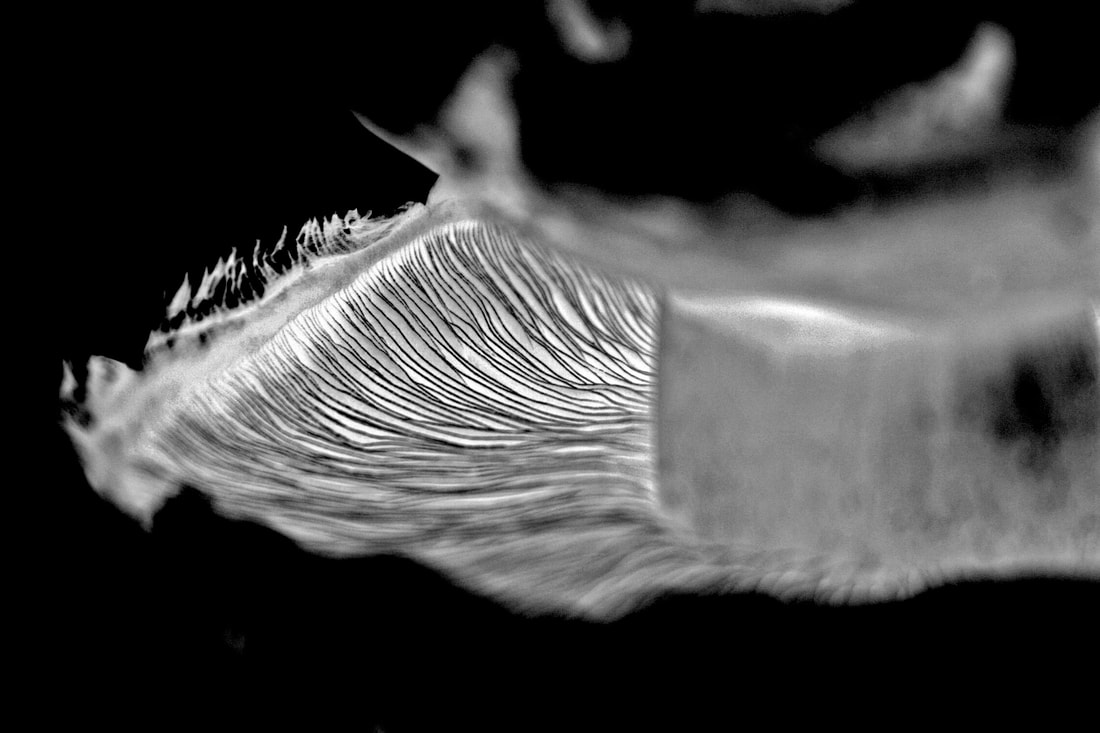
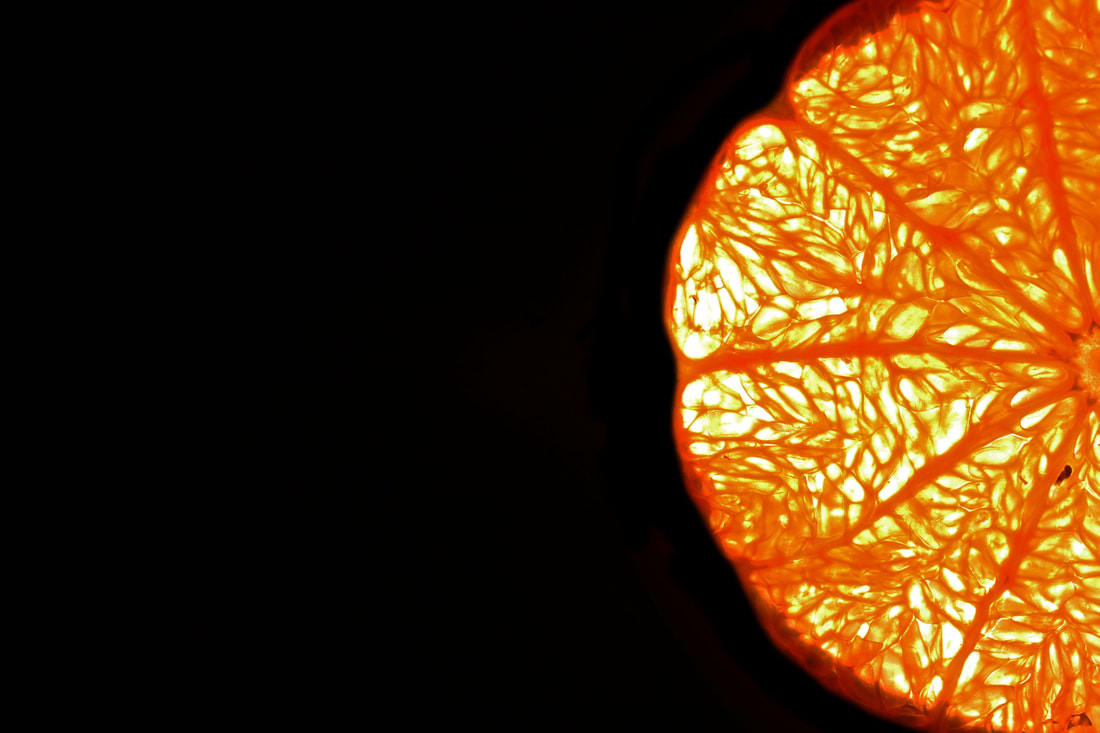
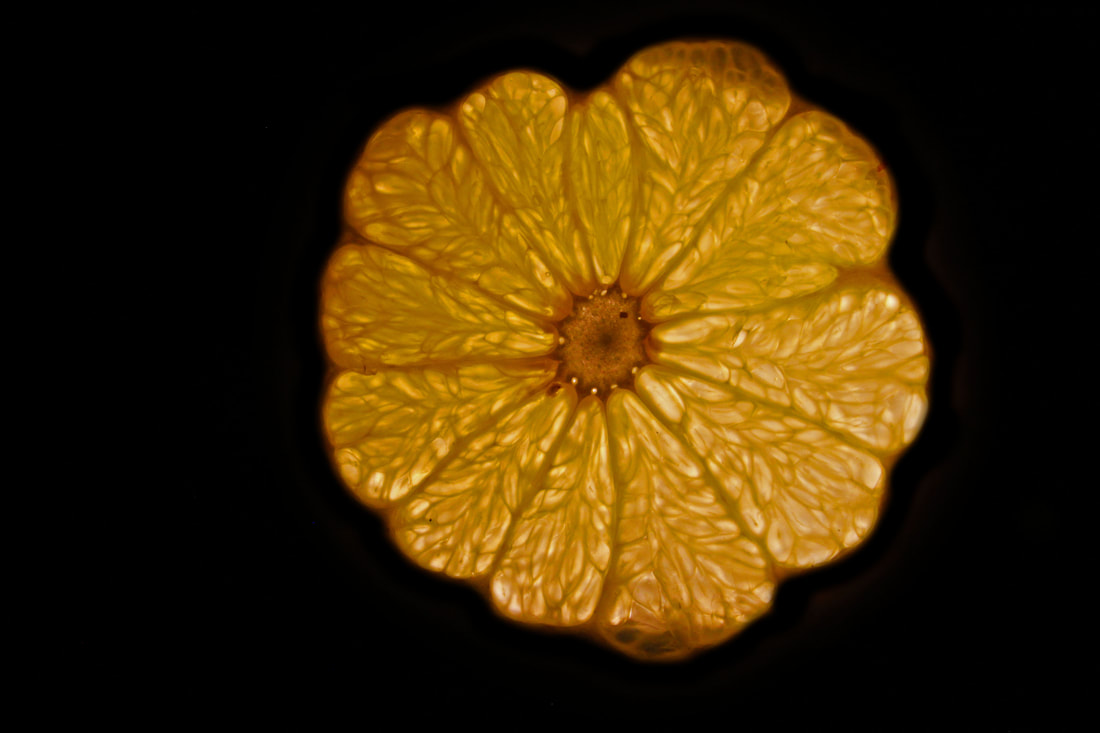
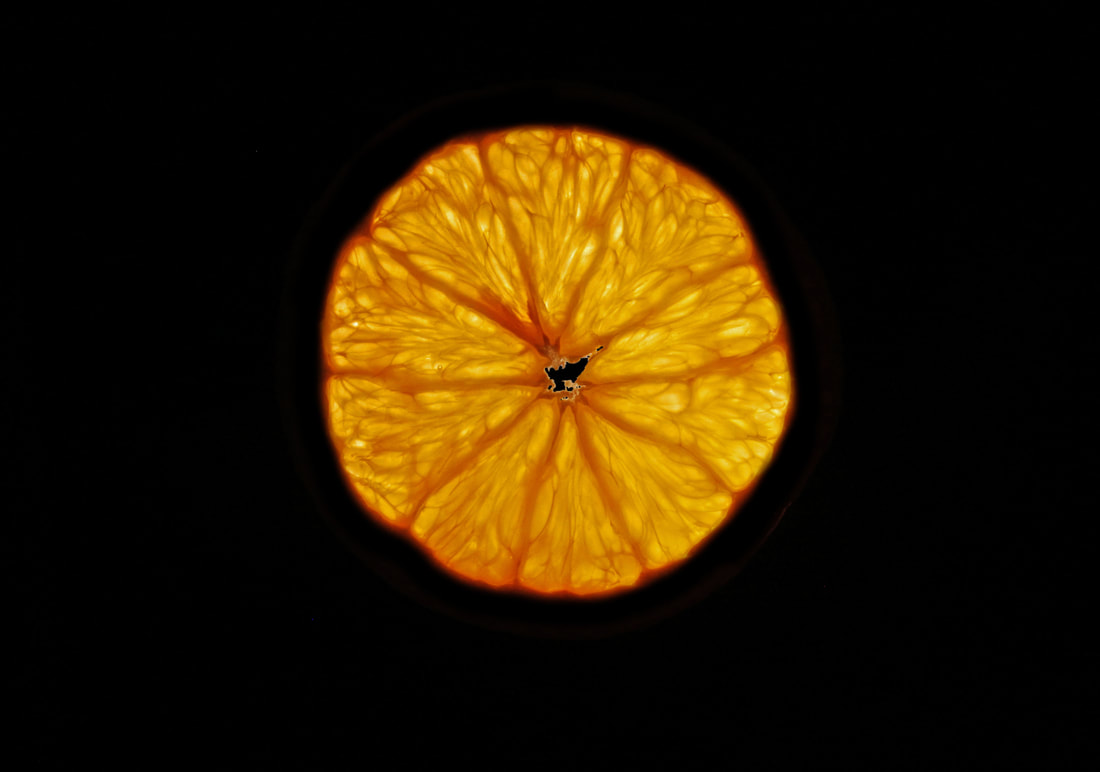
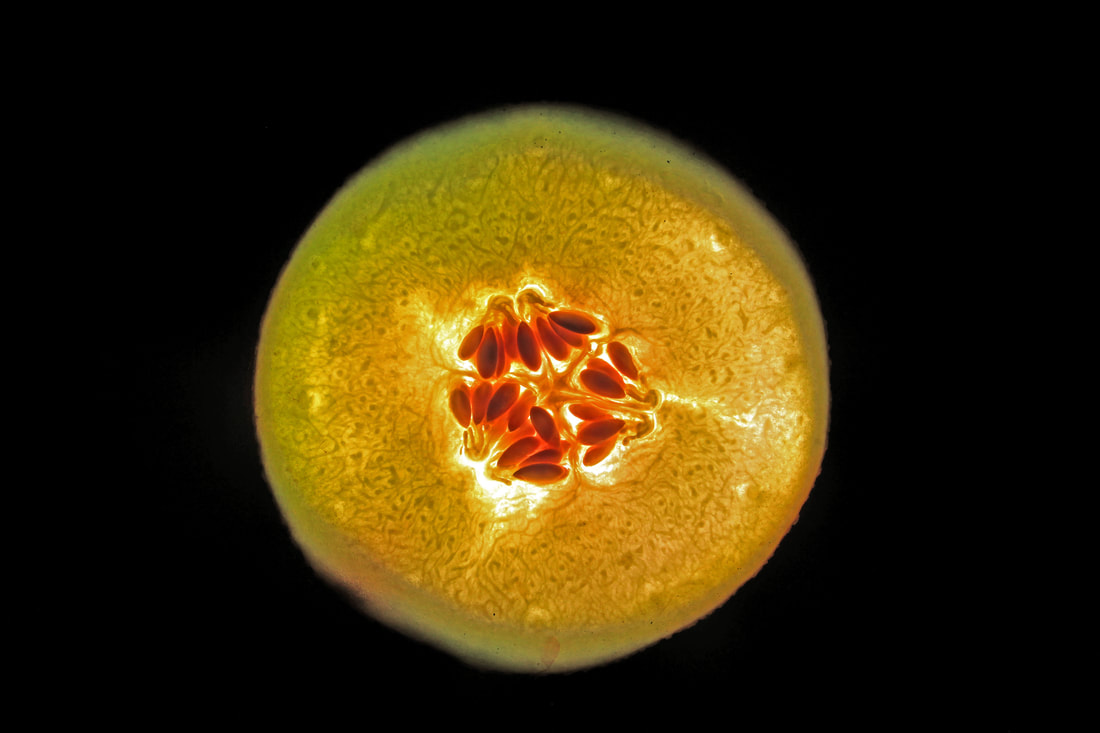
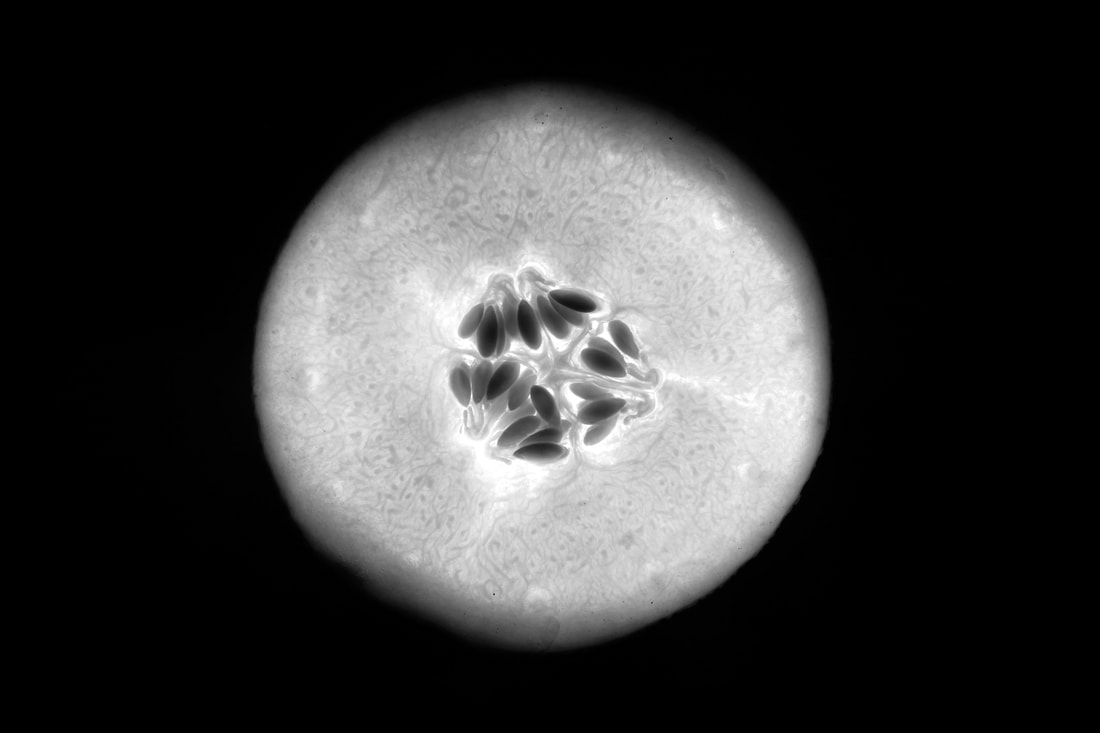
Now I have experimented with the dark room and the structure of different objects using different lighting , I am going to expand and select different types of fruit and cut them into thin slices. Then I will take the thin slices of fruit and place them on a lightbox, in hope that the light will make the structure of the inside of the fruit stand out and look a lot different compared to my second development where the light was coming from the top i.e. studio lights. I will firstly take photos of the singular fruit cut outs, then I will bring all the cut-outs together and place them all on the lightbox.
Response:
Response:


Best Edits:
For my edits i am going to explore some past editing techniques that i used in my strand response to Brian Nash Gill, im going to experiment with black and white and colours to see how i can make the structure stand out as much as possible
For my edits i am going to explore some past editing techniques that i used in my strand response to Brian Nash Gill, im going to experiment with black and white and colours to see how i can make the structure stand out as much as possible
|
Colour:
|
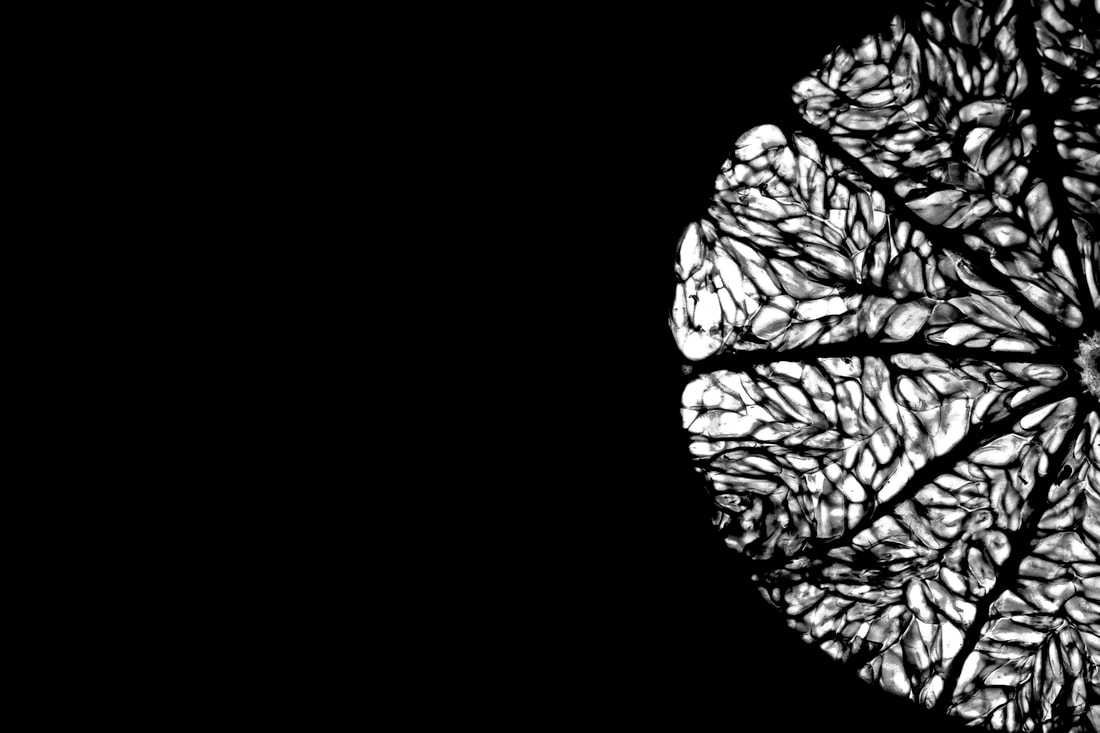
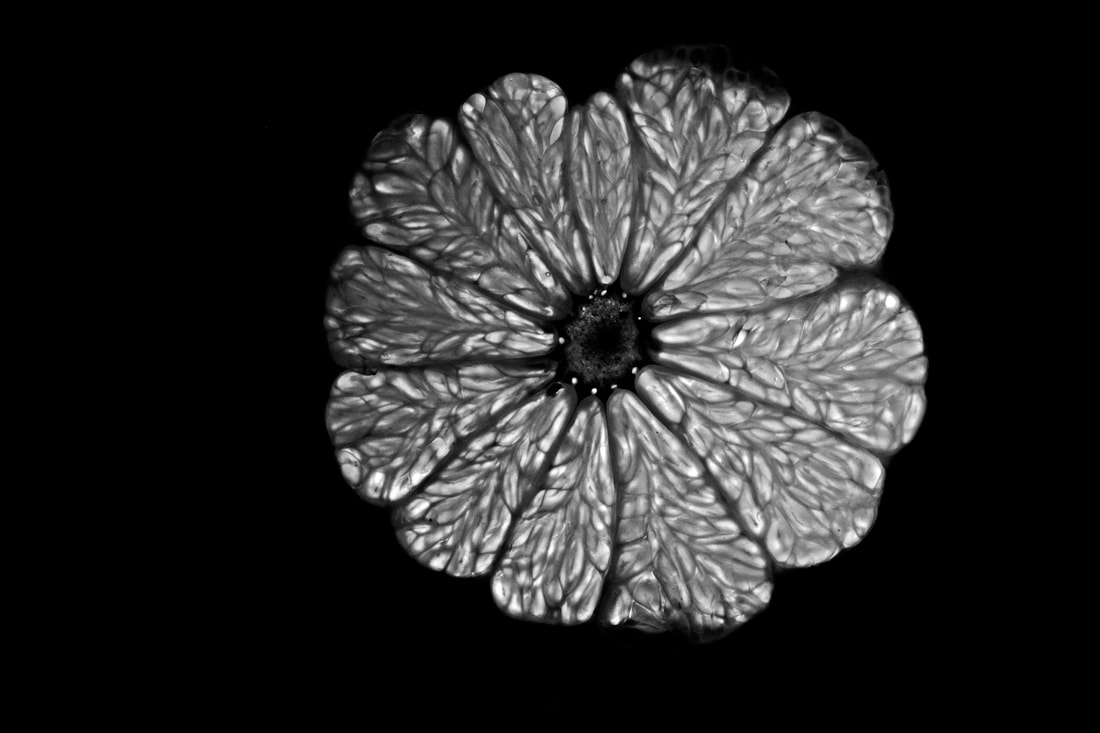
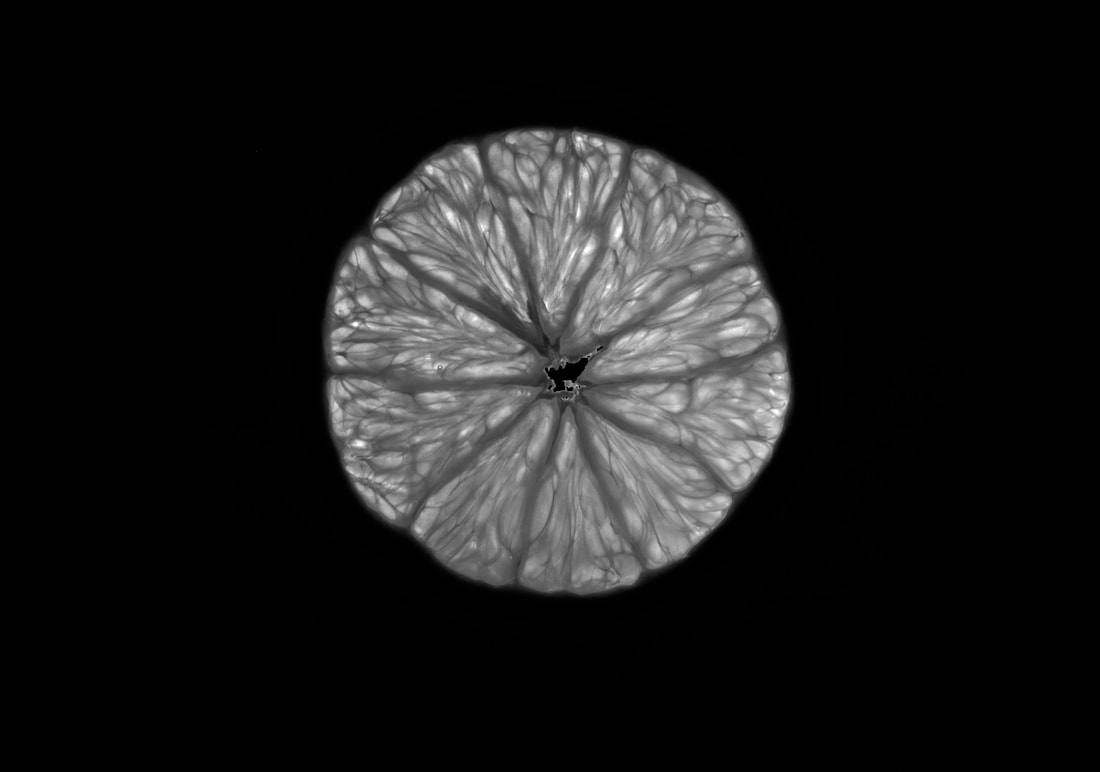
Black And White:
|


|


|
Evaluation: Overall, I am happy with the result of my images. the Lightbox was a great idea in helping to reveal the inside structure of the fruit. With the outside skin being darker I thought it helped the inside pop even more and also gave a focusing point. Next time I would probably take even more images of singular fruit and see what would happen if I added light coming from the top As well.
Final piece:
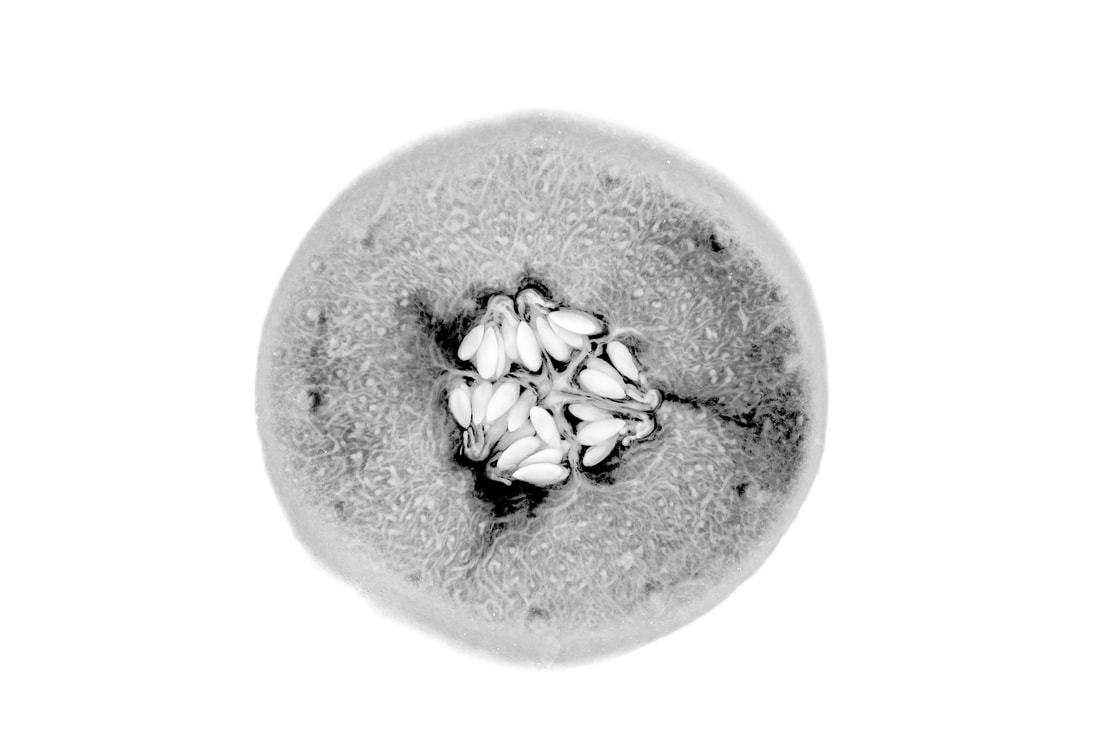
For my Final Piece I'm going to make cut outs on a black sheet of card that are of the shape of all the fruit I used in the last development. Then I'm going to place the cut-outs on top of a stronger lightbox then place the thin slices of the fruit on the cut-outs and photograph them. I'm hoping that the black sheet will make the structure of the fruit stand out a lot more. Then i will edit my photos in multiple different ways maybe using old editing techniques from my previous strands
Response:
Response:


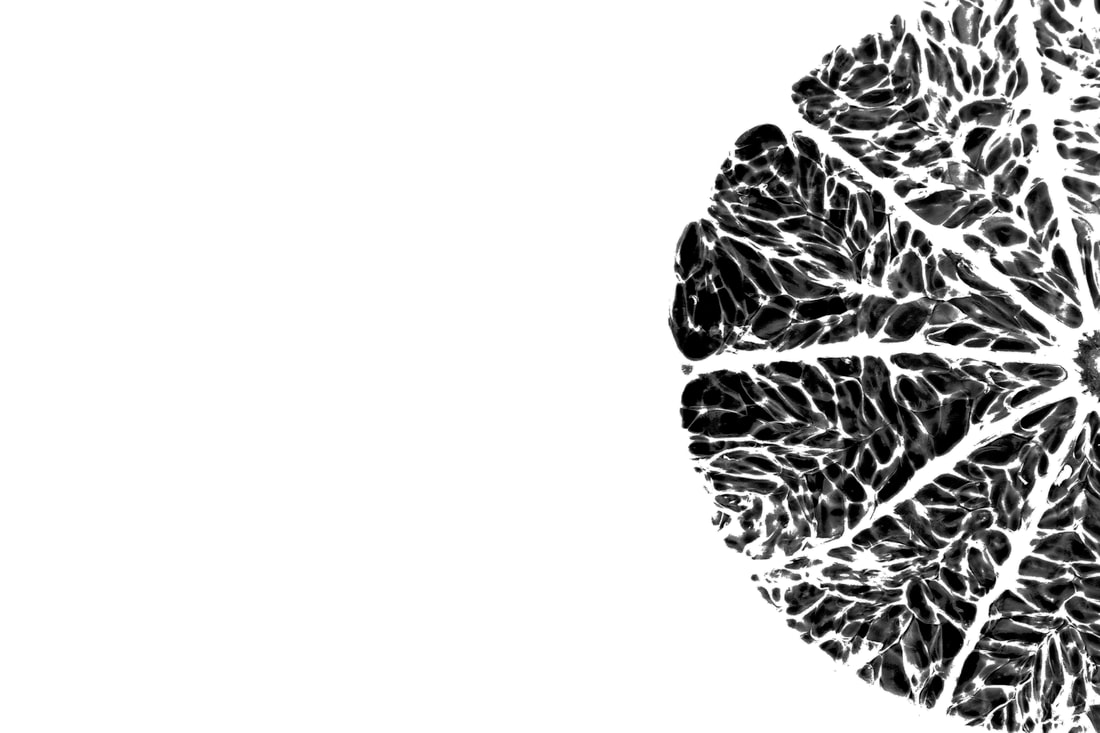
Best Edits: For my edits i wanted to again experiment with colour, black and white to help make the structure stand out. The black cut-outs will help with this as the fruit will stand out much more.
First set of Edits: for these edits i wanted to keep the clour and see how i could make the shapes inside of the fruit stand out as much as possible.
|
|
Evaluation: I'm happy with these edits, I like how the colour is a lot more prominent, especially the structure as well., however the colour can also effect the structure. I want to have the structure more pure and the main focus of the image to be the structure.
Second set of edits: so for my next set of edits I wanted to experiment with discarding the colour in the photos and seeing how the structure is effected by this technique.
|
|
Evaluation: This set of edits is much more successful in showing the structure of the fruit, however I think I can use another editing technique to enhance the structure even more, Invert, which I used for the old strand of Brian Nash Gill to enhance the structure of the wood.
Third set of edits: So for my third set of edits I wanted to used the invert tool which I also used to respond to the artist I had chosen to develop Brian Nash Gill. To successfully express the structure of the fruit I messed around with the invert tool, making sure it had the right amount so that the structure of the fruit was still shown the best.
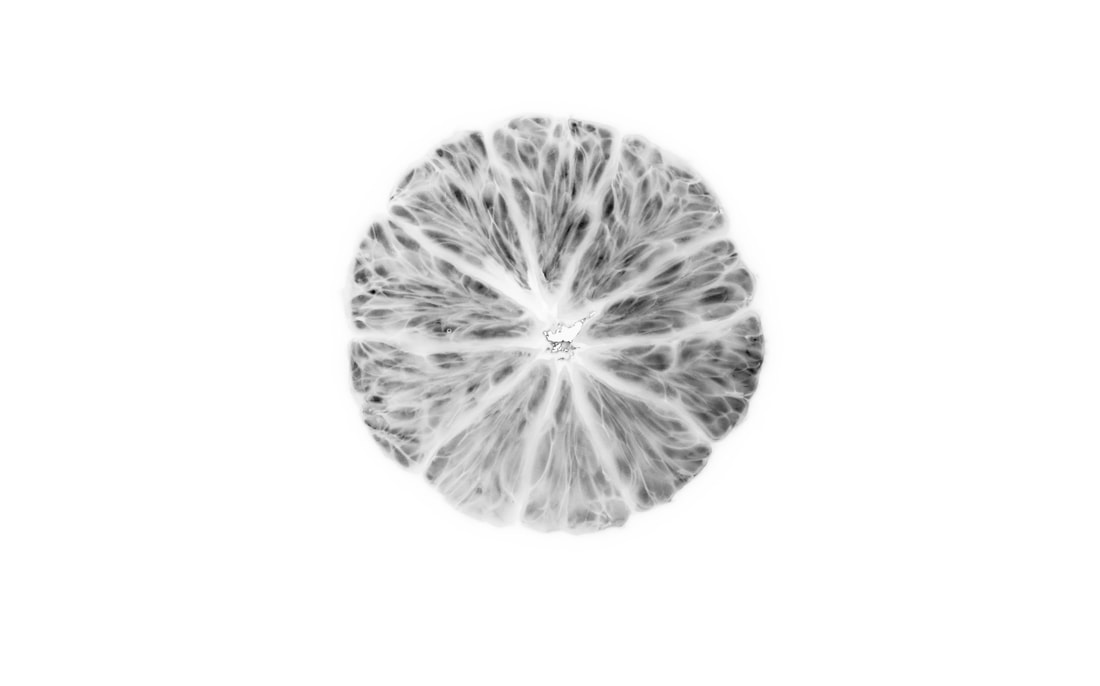
|

|
Evaluation:
For my final piece I am very happy with the outcome, I had gone back to look at the artist I had chosen to respond to in the first place and implement the style of his prints into my developments which successfully showed the structure of the fruit. The invert tool was very successful in my final edits in achieving this as it almost created the print like photos of Brian Nash Gill with my own developing responses. Next time if I was going to recreate my developments I would use other techniques to show the structure of the fruit, for example standing the fruit upright and shining a light behind it.
